First Woodworking Project: 5 Builds That Teach Essential Skills (And Actually Work)
I’ll never forget my first “real” woodworking project.
I wanted to build a bookshelf. Grand, ambitious, full of dovetails and perfect joinery.
Three days later?
I had a pile of ruined plywood, a chipped chisel, and a bruised ego.
I almost quit that week.
But then my mentor said something that changed everything:
“Don’t start with what you want to build. Start with what you need to learn.”
That’s when I built my first real woodworking project: a simple push stick.
It took 20 minutes.
Used scrap wood.
Taught me measuring, cutting, and safety.
And it saved my fingers on my very next cut.
Today, I’m giving you the exact 5 first woodworking projects I recommend to every beginner student — not because they’re flashy, but because they teach real skills while creating useful tools for your shop.
No fluff. No frustration. Just confidence-building wins.
Why Most First Woodworking Projects Fail (Before They Begin)
Most beginners make one of three mistakes:
- They pick projects based on looks → Dovetail boxes look cool… but require 10 skills you don’t have yet.
- They skip the fundamentals → No measuring practice, no safety habits, no test cuts.
- They use expensive wood → Ruining $50 of walnut on your first cut kills motivation.
But the real secret?
Start with projects that serve your next project.
Build tools that make your shop safer, more organized, and more precise.
That’s how you learn while you build.
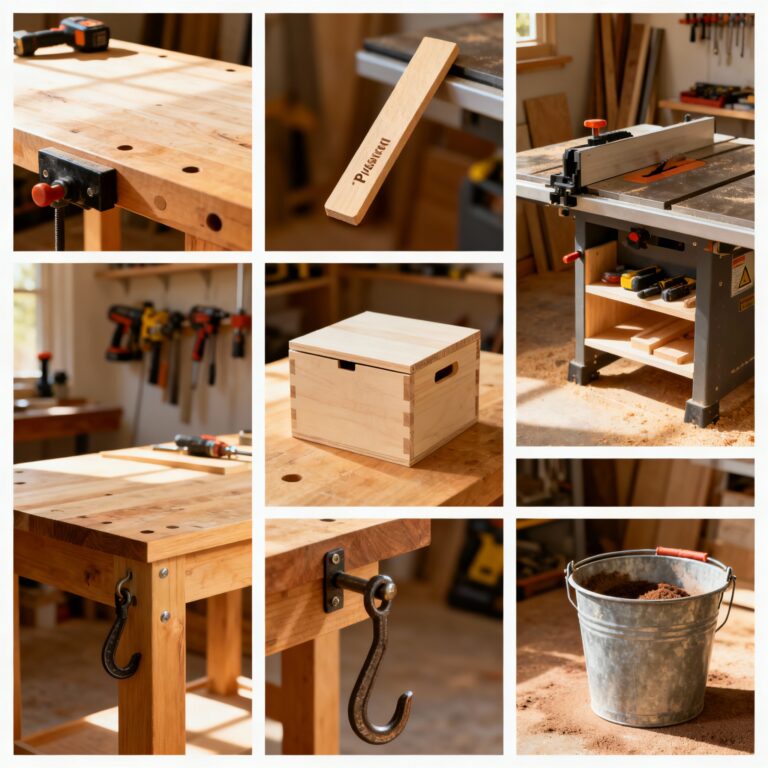
The 5 First Woodworking Projects That Actually Teach Skills
These builds are designed for real beginners — simple cuts, minimal tools, maximum learning.
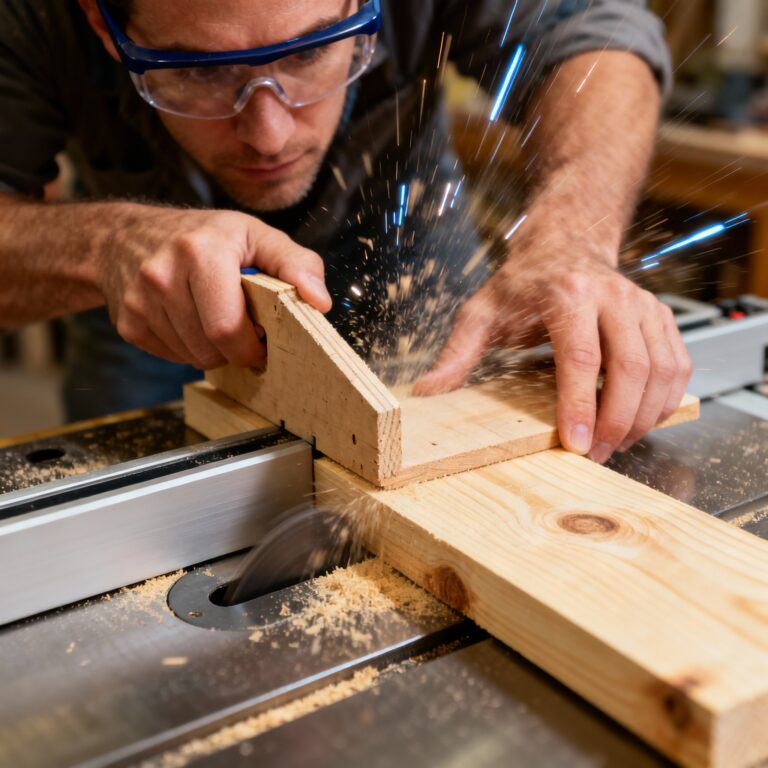
Project #1: The Push Stick (Your Safety Lifeline)
Why it works:
- Teaches: measuring, straight cuts, sanding
- Solves: finger safety on rip cuts
- Time: 20 minutes
What you’ll learn:
- How to measure and mark accurately
- How to make a clean, straight cut on the table saw
- Why safety isn’t optional
🧑🔧 Daniel’s Story: I skipped the push stick on my third project. My fingertip still has the scar. Now, I build one with every new student on Day 1.
📌 Pair this with our Woodworking Shop Safety Guide .
Project #2: The Simple Practice Box (Your Joinery Lab)
Why it works:
- Teaches: square cuts, glue-up, clamping
- Solves: wasted expensive wood
- Time: 2 hours
What you’ll learn:
- How to cut perfect 90° crosscuts
- How to apply glue evenly
- How to clamp without warping
Pro Tip: Use pine or poplar. Keep it small (6” x 4” x 3”).
Mistakes here cost $2 — not $50.
Project #3: The Workbench Hook (Your Organization Starter)
Why it works:
- Teaches: drilling, countersinking, finishing
- Solves: tools on the floor
- Time: 30 minutes
What you’ll learn:
- How to drill clean holes
- How to countersink screws
- How to apply a simple finish
Hang it on your bench. Use it for clamps, tape measures, or push sticks.
Instant organization.
Project #4: The Dust Collection Bucket (Your Problem-Solver)
Why it works:
- Teaches: curved cuts, routing, problem-solving
- Solves: sawdust everywhere
- Time: 1 hour
What you’ll learn:
- How to use a jigsaw or bandsaw
- How to route a clean edge
- How to design for function
Cut a hole in the side. Attach a shop vac hose.
Your lungs (and your shop) will thank you.
Project #5: The Jig Storage Rack (Your Precision Foundation)
Why it works:
- Teaches: layout, dado cuts, labeling
- Solves: lost jigs
- Time: 1.5 hours
What you’ll learn:
- How to plan a layout
- How to cut consistent dados
- Why organization = precision
Store your push sticks, squares, and marking knives.
See everything at a glance.
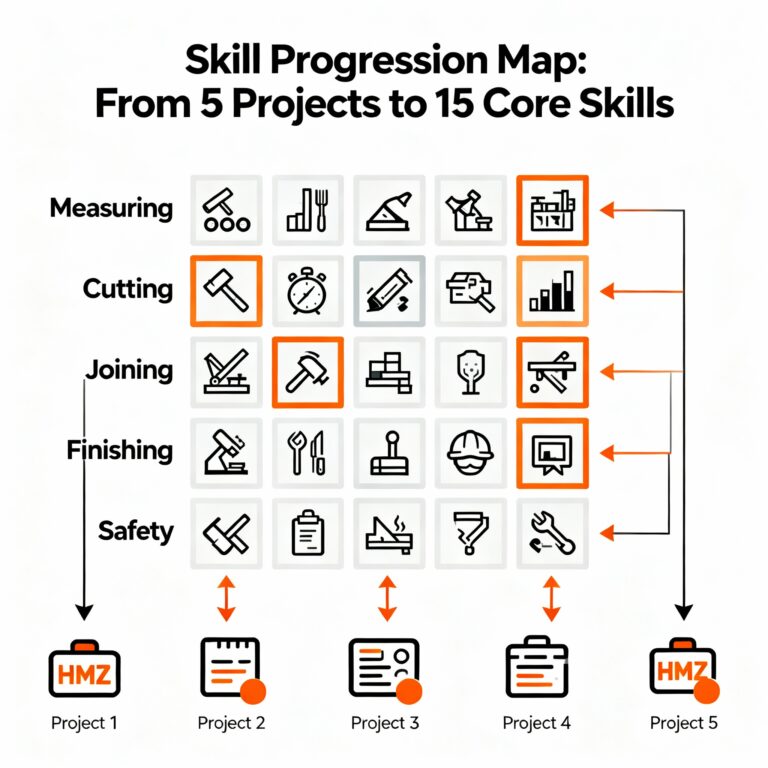
The Skill Progression Map (What You’ll Actually Learn)
Project | Core Skills Learned |
|---|---|
Push Stick | Measuring, straight cuts, safety |
Practice Box | Square cuts, glue-up, clamping |
Workbench Hook | Drilling, countersinking, finishing |
Dust Bucket | Curved cuts, routing, problem-solving |
Jig Rack | Layout, dado cuts, organization |
This isn’t just building.
It’s structured skill acquisition.
Common Mistakes to Avoid
❌ Using expensive wood → Start with pine or poplar.
❌ Skipping test cuts → Always test on scrap first.
❌ Rushing the finish → Sanding matters — even on tools.
❌ Not labeling projects → Write the date and skill on the bottom.
❌ Working alone → Share your builds — get feedback, stay motivated.
Real Results: Maria’s Confidence Journey
Maria, a student of mine, started with the push stick.
Then the practice box.
Then the hook.
Then the bucket.
Then the rack.
In 3 weeks, she’d built 5 useful tools — and learned 15 core skills.
Her first “real” project? A floating shelf.
It was perfect.
“I finally feel like a woodworker — not just someone with tools.”
Before You Cut Your First Board — Tune Your Saw
Here’s the truth no one tells you:
Your first woodworking project is only as good as your table saw.
If your saw isn’t tuned, your cuts won’t be square — and your projects won’t fit together.
I used to blame my wood. My glue. My clamps.
Then I realized: my saw was off by 1/32”. That’s all it took to ruin the fit.
That’s why I created the FREE “Dead-Square Every Time” Table Saw Tune-Up Checklist.
It’s a 15-minute guide to calibrating your saw for perfect 90° cuts — no dial indicator needed.
It’s the first step to builds that fit, look professional, and last for years.
You’ve Got This
Your first woodworking project isn’t about perfection.
It’s about starting right.
Pick one of these 5 builds.
Follow the steps.
Learn the skills.
And watch your confidence grow — one cut at a time.
Go build something great — and keep your fingers safe.
— Daniel
HMZ Woodz