Router table tips can seriously transform your woodworking from “why won’t this work?!” to “No way!, I actually made that!” So you’ve got a router, right? That loud, scary beast that probably made you jump the first time you fired it up? Well, here’s the game-changer—flip that sucker upside down and mount it in a table, and boom! You’ve just unlocked a woodworking superpower.
But with great power comes the need for control. Before you start spinning bits at 20,000+ RPM, you need to know exactly how to manage that speed and which bits are safe for table use.
I get it, I get it. Router tables can look pretty intimidating at first glance. All that spinning and buzzing, and you’re thinking “How the heck do I make this thing cooperate?” Trust me, we’ve ALL been there. My first attempt? Let’s just say the wood looked like it went ten rounds with Mike Tyson and lost spectacularly. I was missing the fundamental safety protocols and the “Big 3” bit knowledge that actually makes table work precise. That’s exactly why I packed all those non-negotiable safety rules and maintenance tips into The Essential Router Bit Guide—so you don’t have to learn the hard way like I did.
But here’s the thing about these router table tips—once you get the hang of them, your router table becomes your workshop’s best friend. It’s like the difference between trying to write a letter while someone’s shaking your desk versus having a rock-solid surface. Complete night and day transformation!
Why Router Table Tips Matter (Spoiler: It’s All About Control!)
Look, handheld routers are great and all, but mounting one in a table? That’s where the real magic happens with these router table techniques.
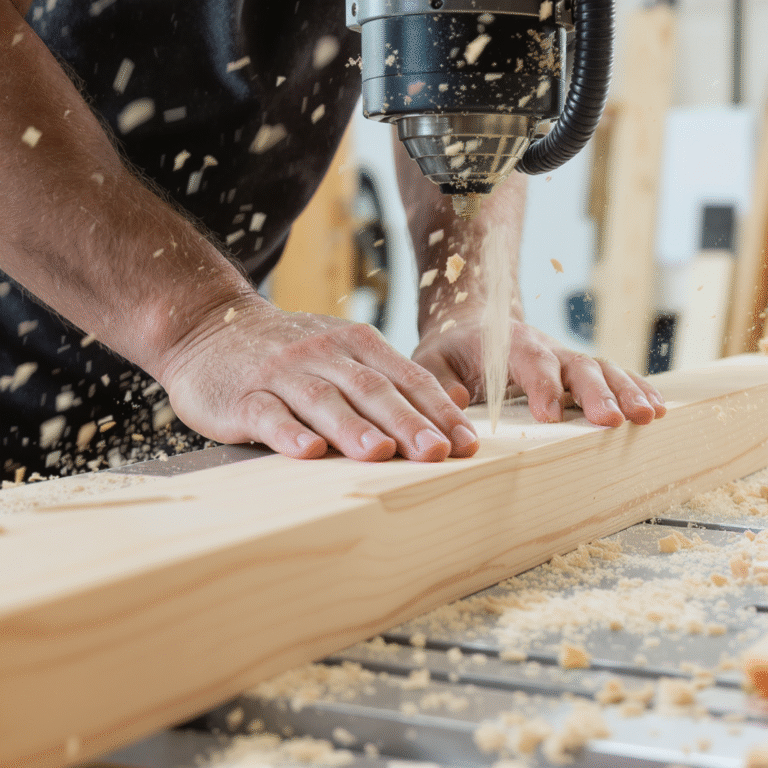
You’ll Actually Have Control Over This Thing Instead of wrestling with a heavy, vibrating router while trying to keep it steady on your workpiece, you just guide the wood over a nice, flat table. The router stays put, you move the wood. Way easier, way more accurate. This is honestly one of the most important router table tips for beginners.
It’s Actually Safer (No, Really!) I used to be genuinely terrified of routers until I got a table. Now the spinning bit is safely tucked under the table, and my hands are always on the wood – never anywhere near the scary spinning part. Plus, working with tiny pieces isn’t a white-knuckle experience anymore. These safety-focused woodworking router tips are total game-changers.
Your Joints Will Look Like a Pro Made Them Want perfect dadoes for shelves? Rock-solid rabbets for boxes? The fence and miter slots make this stuff almost foolproof. Almost. (You can still mess it up if you really try – ask me how I know!)
Make a Hundred Identical Cuts Without Going Crazy Set up a stop block once, and you can crank out identical pieces all day long. Your future self will send thank-you cards when you’re building that cabinet with 47 identical parts.
Essential Router Table Setup Tips (Don’t Skip This Part!)
Before you start making sawdust, spend five minutes on setup. These router table tips will save you hours of frustration later.
Your Fence Better Be Straight This isn’t negotiable, folks. If your fence is wonky, everything you make will be wonky. Use a good square to make sure it’s perfectly 90 degrees to the table. Future you will literally send thank-you cards for following this router table setup advice.
Get Yourself Some Featherboards These things are pure genius – they’re like having an extra pair of hands that hold your wood exactly where it needs to be. No more chattering, no more “oops, that piece just shot across the room” moments. Seriously one of the best router table techniques you can master.
Test Cuts Are Your Best Friend I don’t care if you’re in a hurry. I don’t care if you’re “pretty sure” the setup is right. Test on scrap wood first. Every. Single. Time. Ask me how I know this is important (spoiler: I learned the expensive way).
Advanced Router Table Tips That’ll Make You Look Like a Wizard
Alright, here’s where things get really fun. These aren’t just basic router table tips – they’re the game-changers that separate the pros from the weekend warriors.
The Zero-Clearance Fence Trick Make yourself a wooden fence that bolts onto your regular fence, then cut right into it with your router bit. Sounds crazy, but it gives you perfect support right up to the bit. No more tear-out, no more fuzzy cuts. It’s like magic, but with more sawdust. This is one of those advanced router table techniques that’ll blow your mind.
Stop Tear-Out Dead in Its Tracks Cutting across the grain and getting ugly tear-out? Here’s the fix that’s saved my bacon countless times: don’t try to cut all the way through in one pass. Cut most of the way, flip the board, then finish from the other side. Clean cuts every time with these woodworking router tips.
The Stop Block Game-Changer Need to cut a bunch of pieces to the exact same length? Clamp a block of wood to your fence as a stop. Butt your workpiece against it, make the cut, repeat. No measuring, no marking, no thinking required. Pure router table tips gold right here.
Speed Matters More Than You Think Big bits = slow speed. Small bits = fast speed. Don’t wing it – check what the bit manufacturer recommends. Running too fast will burn your wood (or worse, break your bit and scare the daylights out of you). Running too slow won’t cut cleanly. There’s a sweet spot, and it’s usually printed right on the package.
Your Router Table Is a Joint-Making Machine Dadoes, rabbets, half-laps – your router table can do it all with the right router table techniques. The secret? Set up a stop block and make overlapping passes to clear out the waste. Takes a few passes, but the results are absolutely worth it.
Router Table Tips for Climate and Maintenance
Real Talk: Climate and Your Router Table Depending on where you live, humidity can seriously mess with your wood (and your cuts). These climate-specific router table tips will save you major headaches. If you’re in a humid area, that zero-clearance fence becomes even more important – moisture makes wood tear out more easily. In dry areas, sometimes cutting a profile actually helps relieve stress in the wood and prevents cracking. Who knew?
Oh, and keep your bits clean and dry. Rusty bits cut about as well as you’d expect (which is to say, terribly). Regular maintenance is one of those router table tips that seems obvious but gets forgotten until it’s too late.
Critical Router Table Safety Tips (Because Nobody Wants to Explain Missing Fingers)
Router tables are way safer than handheld routers, but let’s not get cocky. These safety-focused router table tips could literally save your fingers:
- Unplug the thing when changing bits. Always. No exceptions.
- Use push blocks and featherboards religiously
- Safety glasses and ear protection aren’t optional accessories
- Stand to the side, not directly behind your workpiece
- If a small piece gets stuck near the bit, turn off the router and wait for it to stop completely. Don’t go fishing for it with your fingers!
Following these router table safety guidelines isn’t just smart – it’s essential for long-term woodworking success (with all ten fingers intact).
Putting These Router Table Tips Into Action
Here’s the bottom line: mastering these router table tips will completely transform your woodworking game. You’ll make cleaner cuts, stronger joints, and honestly? You’ll have way more fun doing it.
Your router table isn’t just another tool collecting dust in the corner – it’s your ticket to making stuff that looks like it came from a real furniture shop, not your garage (even if it totally did come from your garage).
These router table techniques work for everyone, from complete beginners to experienced woodworkers looking to up their game. The key is starting with the basics and building your skills over time.
So what’s the first router table tip you’re gonna try? The zero-clearance fence? Stop blocks for identical cuts? Whatever it is, start with some scrap wood and don’t be afraid to mess up a few times. That’s how you learn, and trust me – once you master these woodworking router tips, you’ll wonder how you ever lived without them.
Router Table Bit Selection: The Secret Sauce Nobody Talks About
Here’s something most router table tips don’t cover – your bit choice can make or break your project. And I’m not just talking about picking the right profile (though that matters too).
Carbide vs. High-Speed Steel: The Real Deal Look, high-speed steel bits are cheaper, but carbide bits will change your life. They stay sharp longer, handle hardwoods like a champ, and give you cleaner cuts. Yeah, they cost more upfront, but when you’re not replacing bits every few months, your wallet will thank you. This is one of those woodworking router tips that pays for itself.
Bearing-Guided vs. Non-Bearing: When to Use What Bearing-guided bits follow your template or the edge of your workpiece – great for edge profiles and template work. Non-bearing bits need a fence for guidance but give you more control over depth and positioning. Having both types in your arsenal is essential for mastering router table techniques.
The Bit Height Sweet Spot Here’s a pro tip that’ll save you from some ugly mistakes: never expose more bit than you absolutely need. Too much bit sticking up = more vibration, more tear-out, and honestly, it’s just scarier. Start shallow and work your way deeper if needed.
Router Table Dust Collection: Your Lungs Will Thank You
Nobody likes talking about dust collection, but ignoring it is like ignoring that weird noise your car makes – eventually, it’ll bite you. These router table tips for dust management are game-changers:
Under-Table Collection is King Mount a dust port right under your router opening. Most of the chips and dust get sucked away before they can mess with your cut quality or clog up your workspace. Plus, you can actually see what you’re doing instead of working in a dust cloud.
Above-Table Options for Stubborn Dust Some operations just create dust that wants to go everywhere. A simple dust collection hood that attaches to your fence can capture a lot of what the under-table collection misses. You can buy fancy ones or make your own from PVC and shop vacuum hose.
Router Table Jigs That’ll Make You Feel Like a Genius
Ready for some next-level router table techniques? These shop-made jigs will expand what your router table can do:
The Circle-Cutting Jig Want to cut perfect circles without a bandsaw? Make a simple plywood base with a pivot point and a slot for your workpiece to slide through. Clamp it to your router table, and you can cut circles from tiny to huge. It’s like having a compass, but for wood.
The Box Joint Jig Box joints (finger joints) look complicated, but with a simple jig, they’re actually pretty straightforward. All you need is a piece of plywood with a slot and a positioning pin. Set it up once, and you can crank out perfect box joints all day long.
The Tapering Jig Need to taper table legs or make angled cuts? A tapering jig lets you do this safely on your router table. Way better than trying to balance a board at an angle while it’s moving past a spinning bit.
Troubleshooting Common Router Table Problems
Even with the best router table tips, things can go sideways. Here’s how to fix the most common issues:
Burn Marks on Your Wood Usually means you’re moving too slow, your bit’s dull, or you’re taking too big a bite. Speed up your feed rate, check your bit sharpness, and consider making multiple lighter passes instead of one heavy cut.
Chatter and Vibration This is almost always a workpiece support issue. Make sure your wood is flat against the table and tight against the fence. Featherboards are your friend here – use them liberally.
Tear-Out Despite Your Best Efforts Try a climb cut (feeding the wood in the opposite direction) for the final pass. Sounds scary, but if you keep the cuts light and maintain control, it can eliminate tear-out completely. Just be extra careful – climb cuts want to pull the workpiece, so keep a firm grip.
Router Bogging Down You’re probably trying to remove too much material at once. Router bits work best with multiple light passes rather than one heavy cut. Your router will run smoother, your cuts will be cleaner, and your bits will last longer.
Router Table Maintenance: Keep It Running Like New
Here are some router table tips for keeping everything in top shape:
Monthly Cleaning Ritual Unplug everything, pull out the router, and give the whole table a good cleaning. Router dust gets into everything and can affect your accuracy. A shop vacuum and some compressed air work wonders.
Bit Maintenance That Actually Works Clean your bits with oven cleaner (seriously). Spray it on, let it sit for a few minutes, then scrub with an old toothbrush. Rinse well and dry completely. Your bits will cut like new again.
Table Surface Care A smooth table surface is crucial for good results. Light rust or pitch buildup? Fine steel wool and some WD-40 will clean it right up. For deeper maintenance, automotive paste wax makes everything glide smoothly.
Router Table Safety: The Stuff They Don’t Tell You
Beyond the basic safety rules, here are some router table safety tips that could save you from a trip to the emergency room:
The Two-Hand Rule Always have both hands controlling the workpiece. If the piece is too small to keep both hands safely away from the bit, use push blocks or make a jig. No exceptions.
The “No Freehand” Rule Never, ever cut freehand on a router table. Always use a fence, template, or jig. Freehand routing is how people get hurt and workpieces get launched across the shop.
Listen to Your Router Changes in sound usually mean something’s wrong. If it suddenly gets louder, starts bogging down, or makes weird noises, stop immediately and figure out what’s happening.
Different Router Table Setups: Finding What Works for You
Not all router tables are created equal, and these router table tips apply to different setups:
Dedicated Router Table vs. Table Saw Extension A dedicated table gives you more workspace and usually better dust collection. But if space is tight, a table saw extension wing can work great – just make sure it’s rock solid and level with your saw table.
Lift Systems vs. Fixed Mount Router lifts are awesome for height adjustments and bit changes, but they’re pricey. A fixed mount works fine if you don’t change setups often. Either way, make sure your router is securely mounted – a loose router is dangerous and inaccurate.
Fence Options That Actually Matter A good fence can make or break your router table experience. Look for one that’s easy to adjust, locks down tight, and has good dust collection. T-track for accessories is nice but not essential.
Router Table Project Ideas to Get You Started
Ready to put these router table techniques to work? Here are some projects perfect for building your skills:
Start Simple: Edge Profiles Roundovers, chamfers, and ogees are perfect first projects. They’re forgiving, and you’ll quickly get a feel for feed rates and bit behavior.
Level Up: Raised Panels Once you’re comfortable with basic profiles, raised panels are a great next step. They teach you about managing grain direction and working with larger workpieces.
Advanced Challenge: Mortise and Tenon Joints Yes, you can cut mortises on a router table! It takes a few jigs and some patience, but the results are incredibly strong and precise.
Expanding Your Router Table Capabilities
These advanced woodworking router tips will take your skills to the next level:
Template Routing Mastery Templates let you reproduce complex shapes perfectly every time. Make your templates from MDF or hardboard, and use a flush-trim bit with a bearing. It’s like having a copy machine for wood shapes.
Multi-Pass Profiling Instead of trying to cut a complex profile in one pass, break it down into multiple simpler cuts. Safer, cleaner results, and less stress on your router and bits.
Grain Direction Strategy Always pay attention to grain direction. Routing with the grain gives cleaner cuts, while routing against it can cause tear-out. Plan your cuts accordingly, and don’t be afraid to approach from different directions on the same piece.
The Router Table Community: Learning from Others
Here’s something most router table tips articles don’t mention – the woodworking community is incredibly helpful. Join some online forums, watch YouTube channels, and don’t be afraid to ask questions. Everyone started somewhere, and most experienced woodworkers love sharing what they’ve learned.
Local woodworking clubs are gold mines of information too. Nothing beats seeing techniques demonstrated in person and getting hands-on help with your specific setup.
Your Next Steps to Router Table Mastery
Mastering these router table tips isn’t something that happens overnight. Start with the basics – getting your fence square, learning proper feed rates, and always using safety equipment. Build your confidence with simple projects before tackling the advanced stuff.
Remember, every pro was once a beginner who didn’t give up. Those perfect-looking joints you see in woodworking magazines? They came from years of practice, plenty of mistakes, and learning from each one.
The beauty of router table work is that it’s incredibly versatile. Whether you’re making simple picture frames or complex cabinet doors, these router table techniques will serve you well. The key is consistency – use the same careful setup approach every time, and your results will steadily improve.
Want to Take Your Precision Even Further?
Here’s the thing – your router table is only as good as the tools feeding it work. If your table saw isn’t cutting square, or your measurements are off, even perfect router table tips won’t save your project.
That’s why I put together something that’s transformed countless workshops: The “Dead-Square Every Time” Table Saw Tune-Up Checklist. This free resource walks you through the exact steps to get your table saw dialed in for perfect accuracy.
Think about it – what good are perfect router table joints if the pieces you cut don’t fit together properly? This checklist covers everything from blade alignment to fence setup, ensuring every piece you cut is exactly what your project needs.
I’ve seen too many frustrated woodworkers struggling with projects that “almost” fit together, not realizing their table saw setup was the culprit. Don’t let sloppy cuts undermine your beautiful router work.
Grab your free copy of “The Dead-Square Every Time” Table Saw Tune-Up Checklist and make sure your entire workshop is working in harmony. When your table saw cuts are dead-on accurate, and you’re applying these router table tips for perfect joinery, you’ll be amazed at the professional results you can achieve.
Because at the end of the day, precision in one area of your shop should match precision everywhere else. Get that checklist, tune up your saw, and then come back to practice these router table techniques. Your projects will thank you!
Now go make some sawdust – the perfectly cut, beautifully joined kind!