You know that sinking feeling when you’re halfway through cutting what should be a perfect circle, and you realize it’s more egg-shaped than round? Or when you’re trying to cut a straight dado by hand, and despite your best efforts with a straightedge, it looks like you guided the router with your eyes closed? Often, it’s not just your hand—it’s using a bit running at the wrong RPM that causes that unpredictable cutting behavior.
I’ve been there, friend. More times than I care to admit.
Three years ago, I was building a coffee table with circular inlays, and after ruining my third piece of expensive walnut (a loss that would have been much easier to swallow if I’d tracked my material waste in a Smart Shop Tracker), I threw my router down in frustration. My wife poked her head into the shop and asked, “Why don’t you just make something to help guide it?”
That simple question changed everything about how I approach routing. The truth is, your router is an incredibly precise tool—but only when you give it the right guidance. Jigs provide the physical path, but you need to understand bit selection and speed management to ensure every cut is clean and safe. That is exactly why I put together The Essential Router Bit Guide—to provide the exact speed charts and bit protocols you need to get professional results with any jig. With some scrap wood and an afternoon of work, you can build simple router jigs that’ll transform your woodworking from frustrating guesswork into precise, repeatable results.
Why Simple Router Jigs Are Game-Changers for Your Workshop
Here’s what I’ve learned after building dozens of jigs over the years: the difference between amateur-looking work and professional results often comes down to one thing—consistency. When you can repeat the same cut perfectly every single time, your projects suddenly look like they came from a high-end furniture maker’s shop.
These three jigs I’m about to share with you will solve the most common routing challenges you face:
- Perfect circles every time (no more wonky curves)
- Dead-straight dadoes and grooves
- Precise mortises that fit like they were machined
By the end of this afternoon project session, you’ll have three tools that’ll serve you for years and make every routing operation more accurate and enjoyable.
Jig #1: The Ultimate DIY Router Circle Jig
Let me tell you about the first time I used a proper circle jig. I was making wooden coasters for my neighbor, and I needed perfect 4-inch circles. After struggling with a compass and jigsaw for an hour (with terrible results), I remembered seeing a circle jig in an old woodworking magazine.
Two hours later, I had a simple jig built, and I was cutting perfect circles like I’d been doing it for decades.
What You’ll Need:
- One piece of 1/4″ Baltic birch plywood, 12″ x 24″
- Wood screws (1″ length)
- A small pivot pin or finish nail
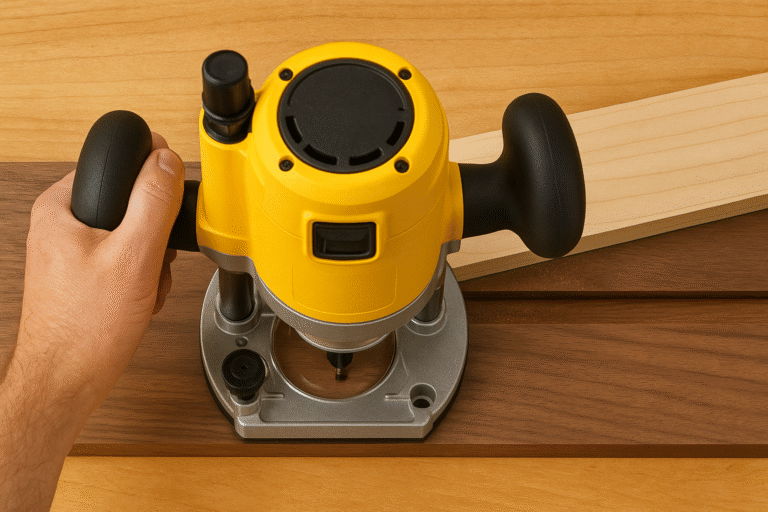
- Your router with a straight bit
Building Your Circle Jig Step-by-Step:
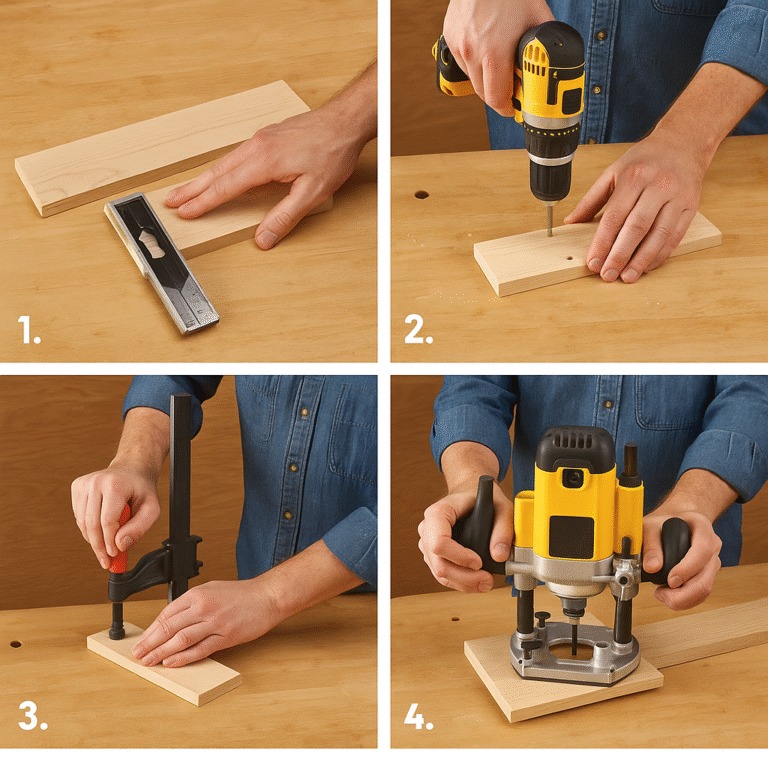
Step 1: Create the Base Cut your Baltic birch into a 12″ x 6″ rectangle. This will be your jig’s base. Sand it smooth—any bumps here will transfer to your workpiece.
Step 2: Route the Router Base Channel Here’s where it gets clever. You’ll route a channel that perfectly fits your router’s base. Place your router on the plywood, trace around the base, then route out this area about 1/8″ deep. This creates a perfect recess for your router to sit in.
Step 3: Create the Adjustment Slot From the center of your router recess, route a straight slot toward one end of the jig. Make this slot about 1/4″ wide and 8″ long. This is your radius adjustment slot.
Step 4: Install the Pivot System At the end of your slot (farthest from the router), drill a small hole and insert your pivot pin. I use a finish nail with the head cut off—it’s perfect for this application.

Using Your Circle Jig:
- Mark the center of your desired circle on your workpiece
- Push the pivot pin into this center point
- Adjust your router position in the slot to set your desired radius
- Secure the router in place
- Route your circle in one smooth, continuous motion
The beauty of this diy router circle jig is its simplicity and accuracy. I’ve cut circles from 2″ diameter up to 16″ diameter with the same jig, and each one is perfectly round.
Jig #2: The Foolproof Router Mortising Jig
Mortises used to be my nemesis. I’d spend ages trying to square up hand-routed mortises with chisels, and they’d still look rough. Then I built this simple mortising jig, and suddenly I was cutting clean, square mortises that needed minimal cleanup.
What You’ll Need:
- Two pieces of 3/4″ plywood, 8″ x 12″
- Several pieces of scrap 2×4
- Clamps
- Wood screws
- Router with appropriate mortising bit
Building Your Mortising Jig:
Step 1: Create the Base and Fence Cut your two pieces of plywood. One becomes your base, the other your fence. The fence will guide your router for perfectly straight mortises.
Step 2: Build the Side Supports From your 2×4 scraps, cut four pieces about 6″ long. These will form the sides of your jig, creating a channel for your router to travel in.
Step 3: Assembly Screw the fence perpendicular to your base, then attach your side supports to create a channel that’s slightly wider than your router base. The key here is ensuring everything is perfectly square and parallel.
Step 4: Add Stop Blocks This is what makes this jig special. Cut small blocks that can be clamped at either end of your channel. These will stop your router at exactly the right points, giving you consistent mortise lengths every time.
Using Your Mortising Jig:
- Clamp the jig to your workpiece with the fence aligned to your mortise location
- Set your stop blocks for the desired mortise length
- Set your router bit depth
- Make multiple passes, increasing depth gradually
- Your mortise will be perfectly rectangular and sized
This router mortising jig has saved me countless hours of cleanup work. The mortises come out so clean that tenons fit perfectly with minimal adjustment.
Jig #3: The Dead-Straight Dado Jig
There’s nothing more frustrating than a wobbly dado that makes your shelves look like they were installed during an earthquake. This simple straight-edge jig will give you dados that are so straight and clean, people will think you own a $3,000 panel saw.
What You’ll Need:
- One piece of 3/4″ MDF or plywood, 8″ x 48″
- One straight piece of hardwood, 1″ x 2″ x 48″
- Wood screws
- Double-sided tape (optional)
Building Your Straight-Edge Jig:
Step 1: Prepare Your Base Cut your MDF to size and ensure one long edge is perfectly straight. If you’re not sure, run it through your table saw to true it up.
Step 2: Attach the Fence Screw your hardwood strip along the straight edge of the MDF. This creates an elevated fence that your router base will ride against.
Step 3: Test and Trim Here’s the critical step: with your router and desired bit installed, run the router along the fence and trim the opposite edge of the MDF. Now your jig shows you exactly where your cut will be.
Using Your Straight-Edge Jig:
- Mark your dado location on your workpiece
- Align the trimmed edge of your jig with your marks
- Clamp the jig securely in place
- Route your dado, keeping the router base tight against the fence
- Enjoy your perfectly straight dado
The secret to this jig’s success is that trimming step. Because you’ve cut the reference edge with the same router and bit you’ll use for your project, there’s no guesswork about offset distances.
Common Mistakes to Avoid When Building and Using Router Jigs
Over the years, I’ve seen (and made) plenty of mistakes with router jigs. Here are the big ones to watch out for:
Mistake #1: Using Warped or Twisted Wood
I learned this the hard way when I built my first circle jig from a piece of plywood that had a slight bow. Every circle I cut had a corresponding wobble. Always check your materials with a straightedge before building.
Mistake #2: Inadequate Clamping
Your jig is only as good as how securely it’s attached to your workpiece. I’ve seen people try to hold jigs in place by hand (dangerous!) or use insufficient clamping pressure. Use proper clamps and don’t rush the setup.
Mistake #3: Wrong Router Speed
Different bits require different speeds, and this becomes even more critical when using jigs. Large circle cuts need slower speeds to prevent burning, while small mortising bits can handle higher speeds. Always check your bit manufacturer’s recommendations.
Mistake #4: Taking Too Heavy Cuts
Just because you have a jig doesn’t mean you can hog out material in one pass. Take multiple light passes, especially on hardwoods. Your jigs will last longer, your cuts will be cleaner, and your router won’t be overworked.
Mistake #5: Neglecting Grain Direction
This one caught me early on. Always consider grain direction when using your jigs. Routing against the grain, even with a perfect jig, can cause tear-out. Sometimes you need to approach the cut from the opposite direction.
Fine-Tuning Your Jigs for Perfect Results
Once you’ve built these basic jigs, here are some upgrades that’ll make them even better:
For Your Circle Jig:
- Add a dust port by routing a channel connected to your shop vacuum
- Create multiple radius slots for different sized circles
- Add measuring marks along the radius slot for quick setup
For Your Mortising Jig:
- Add micro-adjusters to your stop blocks for fine-tuning mortise length
- Include a depth gauge system for consistent mortise depths
- Build in hold-downs to secure irregular-shaped pieces
For Your Straight-Edge Jig:
- Create multiple lengths for different project sizes
- Add a sacrificial strip that can be replaced when it gets torn up
- Include measuring marks for quick positioning
Maintaining Your Simple Router Jigs
These jigs will serve you for years if you take care of them properly. Here’s my maintenance routine:
After Each Use:
- Blow off all dust and debris
- Check for any loosened screws or hardware
- Look for wear on reference surfaces
Monthly:
- Apply a light coat of paste wax to sliding surfaces
- Check all measurements with a reliable square or ruler
- Tighten any loose hardware
Annually:
- Re-cut reference edges if they’ve become damaged
- Replace any worn pivot points or adjustment hardware
- Consider upgrades based on how you’ve been using the jigs
Taking Your Jig-Building Further
Once you’ve mastered these three essential jigs, you’ll start seeing opportunities for custom jigs everywhere. That’s the beauty of this approach—you’re not just building tools, you’re developing a problem-solving mindset.
I’ve built jigs for cutting perfect tenons, routing consistent roundovers, cutting compound angles, and dozens of other specific tasks. Each one started with the same basic principles you’ve learned here: identify the problem, create a reference system, and build in repeatability.
Conclusion
Building these three simple router jigs will transform your routing from a source of frustration into one of your favorite workshop activities. The circle jig will give you perfect curves every time, the mortising jig will revolutionize your joinery work, and the straight-edge jig will make dados and grooves a pleasure to cut.
More importantly, you’ll gain confidence in your abilities and see immediate improvement in your project quality. That feeling when you make a perfect cut on the first try? That’s what these jigs will give you, project after project.
Remember, great woodworking isn’t about having the most expensive tools—it’s about using the right techniques and having the right guides to ensure consistency. These jigs represent years of trial and error distilled into simple, effective solutions.
Start with one jig this weekend, use it on a project, then build the other two when you see how much they improve your work. Before long, you’ll be the woodworker in your area that others come to for advice on getting professional results.
Ready to take your workshop precision to the next level? These router jigs are just the beginning. Your table saw is the heart of your workshop, and keeping it perfectly calibrated is crucial for the accuracy that makes these jigs work their magic.
Download my free “Table Saw Tune-Up Checklist”—a step-by-step guide that’ll ensure your saw is cutting dead-on accurate every single time. This checklist covers blade alignment, fence setup, miter gauge calibration, and all the other critical adjustments that separate amateur results from professional-quality work.
Get your free checklist and start building with the confidence that comes from knowing your tools are perfectly dialed in.