You don’t need a dial indicator, laser calipers, or a machinist’s bench to achieve dead-on table saw blade alignment without dial indicator. In fact, with just a combination square, a sharp pencil, and 20 minutes of focused attention, you can align your blade so precisely that your cuts will feel like they’re guided by magic.
I’m Daniel from HMZ Woodz — a woodworker who’s spent over 8 years chasing perfect joinery, smooth surfaces, and zero kickback. And let me tell you: 90% of the “mystery issues” beginners and intermediates face — burning wood, wandering rips, inconsistent dados — trace back to one silent saboteur: a misaligned blade.
But here’s the good news: you already own everything you need to fix it.
In this comprehensive, step-by-step guide, you’ll learn:
- Why even 0.005” of misalignment destroys cut quality and safety
- The exact “One-Wrench Method” I’ve taught to hundreds of students (no dial indicator required)
- How to measure, adjust, and verify blade parallelism to your miter slot — using tools in your drawer
- Troubleshooting tips for stubborn saws, warped tables, and confusing trunnion systems
- What to do next after alignment (because blade parallelism is just step one)
This isn’t theory. This is battle-tested, shop-floor wisdom — designed for real woodworkers working with real tools in real garages and basements.
Let’s get your saw cutting like it was meant to.
Why Table Saw Blade Alignment Without Dial Indicator Matters More Than You Think
Before we jump into the wrenches and measurements, let’s talk about why this matters — and why “close enough” is never enough.
The Physics of a Misaligned Blade
When your blade isn’t table saw blade parallel to miter slot, you’re not just risking ugly cuts — you’re introducing mechanical stress into every operation.
Imagine pushing a board through the blade while the back of the blade is angled slightly away from the direction of travel. What happens?
- The front teeth cut cleanly.
- The rear teeth rub against the freshly cut kerf.
- Friction builds → heat builds → burn marks appear.
- The wood binds → the motor strains → you get kickback.
It’s not your technique. It’s not your blade quality. It’s geometry.
Real-World Consequences of Poor Alignment
Here’s what happens in your shop when alignment is off — even by a hair:
✅ Burn Marks — Especially on hardwoods like oak or maple.
✅ Wandering Rip Cuts — Your fence is straight, your push stick is firm… but the cut veers.
✅ Dado Set Wobble — Stacked dado blades magnify misalignment, creating uneven shoulders.
✅ Crosscut Sled Inaccuracy — If your blade isn’t parallel to the miter slot, your sled won’t be square to the blade.
✅ Increased Kickback Risk — Binding = danger. Always.
The Myth of “Factory-Aligned”
“I just bought this saw — it should be aligned!”
Nope.
Even high-end cabinet saws ship with slight misalignments. Contractor saws? Often worse. Jobsite saws? Don’t even get me started.
Manufacturers assemble for function, not perfection. It’s up to you — the craftsman — to dial it in.
And you don’t need a dial indicator to do it.
The “One-Wrench” Method: Table Saw Blade Alignment Without Dial Indicator (Step-by-Step)
This is the method I use in my own shop. It’s the method I teach in my weekend workshops. And it’s the method that’s saved countless students from throwing their saws out the window.
All you need:
- Combination square (6” or 12” — must be accurate)
- Sharp pencil or fine-tip permanent marker
- ½” or 9/16” wrench (check your arbor nut size)
- Clean rag
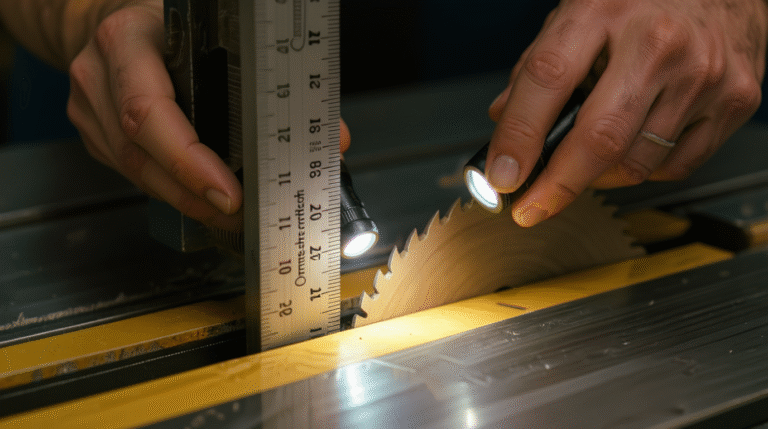
- Flashlight (optional, but helpful — see Image 3)
- Patience (non-negotiable)
⚠️ SAFETY FIRST: Unplug your saw. Remove the throat plate. Wear safety glasses. No exceptions.
STEP 1: Mark Your Reference Tooth
Rotate your blade by hand until one carbide tooth is pointing directly forward — toward the front edge of your table.
Use your pencil or marker to clearly mark both sides of that tooth. I like to draw a bold line across the flat face of the carbide tip.
carbide tip.
💡 Pro Tip: Choose a tooth near the top — easier to access and less likely to be damaged. Avoid teeth with chips or wear.
This marked tooth is now your reference point. You’ll measure from this exact spot — front and back.
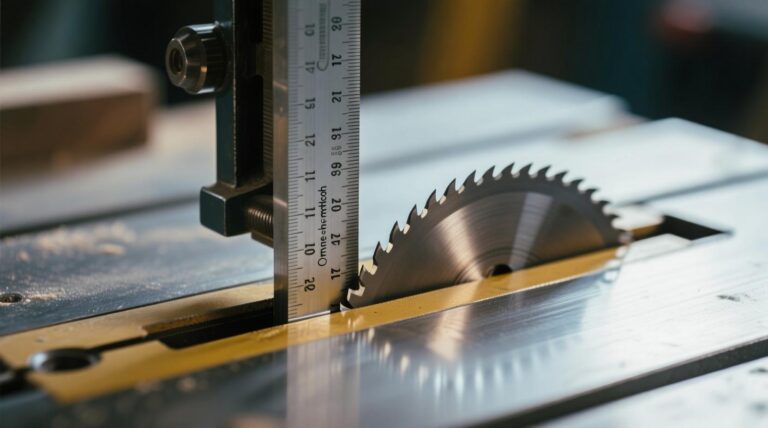
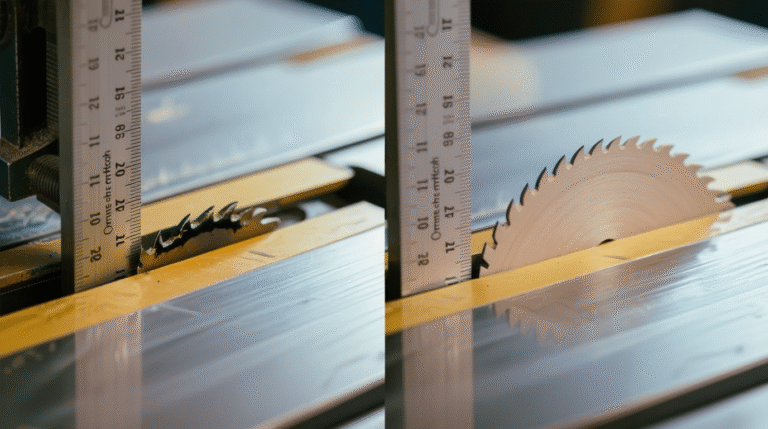
STEP 2: Zero In on the Miter Slot
Place the ruler portion of your combination square into the left miter slot — the one closest to your fence. This is your reference track. The blade must be parallel to this.
Slide the head of the square forward until it makes firm, flush contact with the side of your marked tooth.
✅ Critical: The square must sit FLAT in the miter slot. No tilting. No rocking.
Now, look closely at where the edge of the tooth aligns with the ruler’s scale.Write this number down. Example: 0.748”
🔦 Use a flashlight here . Even a sliver of shadow can trick your eye. Look for true metal-to-metal contact — no gaps.
STEP 3: Rotate. Don’t Move. Measure Again.
Without moving the square or changing its position in the miter slot, rotate the blade 180 degrees by hand until your marked tooth is now at the back of the saw — pointing directly away from you.
Again, slide the square’s head up against the same side of the same tooth.
Take your second measurement.
Write it down. Example: 0.754”
STEP 4: Do the Math — Find Your Error
Subtract your front measurement from your back measurement.
Back Measurement – Front Measurement = Misalignment
Example:
0.754” – 0.748” = 0.006” toe-out at the rear
What does this mean?
- If the back number is larger → Blade is angled away from the fence at the rear (“toe-out”)
- If the front number is larger → Blade is angled toward the fence at the rear (“toe-in”)
Either is bad. You want 0.000” difference — or as close as humanly possible.
🎯 Target Tolerance: Less than 0.002” difference over 10–12 inches of blade travel. That’s thinner than a sheet of paper.
STEP 5: Loosen, Tap, Adjust
Most table saws have trunnion adjustment bolts located under the table — sometimes behind a removable panel, sometimes accessible from the side.
Common locations:
- Cabinet Saws: Bolts on the trunnion brackets, usually 4 total — two per side.
- Contractor Saws: Bolts may connect the trunnion to the underside of the table.
- Hybrid/Jobsite Saws: May require loosening the entire motor assembly.
Use your wrench to slightly loosen the bolts — just enough to allow movement. Do NOT remove them.
Now, depending on your saw:
- If you have adjustment screws, turn them gently to shift the trunnion.
- If you don’t, use a rubber mallet or deadblow hammer to tap the trunnion assembly in the direction needed.
🛠️ Example: If your blade is toed-out at the rear (back measurement larger), you need to move the REAR of the trunnion TOWARD the fence.
Tap. Re-measure. Tap again. Go slow.
STEP 6: Tighten, Recheck, Lock It In
Once your front and back measurements match (or are within 0.002”), gradually tighten the trunnion bolts — alternating sides to avoid shifting.
After tightening, re-measure.
If it moved — back it off, adjust again, and retighten.
When you’re satisfied, do a final verification:
- Rotate the blade 360° — does the tooth stay at the same measurement all the way around?
- If yes → you’re golden.
- If no → your arbor may have runout (we’ll cover that in the troubleshooting section).
STEP 7: Align Your Fence (Don’t Skip This!)
Your blade is now parallel to the miter slot — congratulations!
But if your fence isn’t parallel to the blade, you’ll still get burning and binding.
Quick fence check:
- Set your fence to 4” from the blade.
- Use the same combination square to measure from the fence to the same marked tooth — front and back.
- Adjust fence accordingly (most fences have micro-adjusters at the rear).
📏 Fence tolerance: Also aim for <0.002” difference. Slight toe-out (fence farther at rear) is acceptable — never toe-in.
Troubleshooting: “Why Won’t My Measurements Match?!”
You followed the steps. You measured twice. But the numbers won’t settle. Don’t panic. Let’s fix it.
🚫 Problem #1: Measurements Are Inconsistent or Jump Around
Cause: Sawdust, pitch, or debris between the square and blade — or in the miter slot.
Fix:
- Wipe down the miter slot with a rag and denatured alcohol.
- Clean the blade tooth with a rag and blade cleaner (or WD-40).
- Re-mark your tooth with a Sharpie for better visibility.
- Use a flashlight to verify true contact (Image 3).
🚫 Problem #2: My Trunnion Won’t Budge — It’s Stuck!
Cause: Rust, paint, or overtightened bolts. Common on older saws or contractor models.
Fix:
- Spray penetrating oil (PB Blaster, Kroil) on trunnion pivot points and bolts.
- Let sit 10–15 minutes.
- Tap gently with a rubber mallet.
- If still stuck, remove bolts completely, clean threads, apply anti-seize, and reinstall.
🚫 Problem #3: My Saw Doesn’t Have Accessible Trunnion Bolts!
Cause: Some saws (especially portable or benchtop models) hide the trunnion under castings or sealed housings.
Fix:
- Check your manual for “blade alignment procedure.”
- Some saws require loosening the motor mount bolts and shifting the entire motor.
- Others require removing the table top or raising the blade assembly.
📩 Stuck? Email me a photo of your saw’s underside — I’ll tell you exactly where to adjust. Seriously. daniel@hmzwoodz.com
🚫 Problem #4: My Blade Wobbles or Measurements Change as I Rotate
Cause: Arbor runout or bent blade.
Fix:
- Remove the blade. Spin the arbor by hand. Look for wobble.
- Use a dial indicator if you have one — or, clamp a pencil to the table and bring its tip near the arbor. Rotate — does the gap change?
- If arbor wobbles > 0.003”, it may need replacing (or the bearings are shot).
- Try a different blade — eliminate the blade as the variable.
🚫 Problem #5: My Miter Slot Is Worn or Damaged
Cause: Old saws, job site abuse, or poor castings can leave miter slots uneven.
Fix:
- Use the right miter slot if the left is damaged (but ensure your fence references the same side).
- Insert a zero-clearance miter sled and align to that instead.
- As a last resort, create a reference edge using a straightedge clamped to the table.
Why This Method Beats Dial Indicators (For Most Woodworkers)
Let’s be honest: dial indicators are precise. But they’re also:
- Expensive ($80–$200+)
- Fragile
- Require magnetic bases, stands, and setup time
- Overkill for woodshop tolerances
The “One-Wrench Method” gives you woodworking-grade precision — not machine-shop perfection. And that’s exactly what you need.
✅ Tolerances under 0.002” are achievable with a good square.
✅ No calibration required.
✅ Tools you already own.
✅ Repeatable in any shop, anywhere.
I’ve aligned over 200 saws this way — from DeWalt jobsite models to 600-pound Unisaws. It works. Every. Single. Time.
What Comes After Blade Alignment? Your 5-Point Saw Tune-Up
Congratulations — you’ve nailed table saw blade alignment without dial indicator. But your saw isn’t “dialed in” yet.
Here’s what to check next:
1. Fence Parallelism (Revisited)
Double-check that your fence is parallel to the blade — slight toe-out (0.001–0.002”) is ideal to prevent binding.
2. Splitter/Riving Knife Alignment
Your splitter must sit directly behind the blade — centered in the kerf. Misalignment here causes kickback.
3. Belt Tension & Motor Alignment
A loose belt causes power loss and vibration. Check tension — you should be able to press the belt down ½” with moderate force.
4. Table Flatness & Extensions
Use a straightedge to check for warps or dips. Shim if necessary. Your outfeed must be co-planar.
5. Blade Height & Bevel Stops
Set your 90° and 45° bevel stops with a reliable square. Calibrate your height scale with a ruler.
Real Woodworker Results: “I Thought My Saw Was Broken…”
“Daniel, I followed your method last weekend. My 15-year-old Delta contractor saw now cuts smoother than my friend’s new SawStop. No more burning maple. I’m embarrassed I waited this long.”
— Mark T., Colorado
“Used a $12 combination square from Harbor Freight. Took 3 tries, but got it within 0.001”. My dado stacks are finally clean. Thank you.”
— Priya L., Ontario
“I’ve owned dial indicators for years. Never got consistent results. Your pencil-and-square method? Nailed it in 18 minutes.”
— Greg R., Oregon
Download Your Free 15-Minute Table Saw Tune-Up Checklist
Perfect blade alignment is just the beginning.
To help you go all the way — from frustrating cuts to flawless joinery — I’ve created a printable, step-by-step checklist that walks you through all 5 critical tune-up points.
✅ Blade Alignment (you just did this!)
✅ Fence Calibration
✅ Splitter Centering
✅ Belt & Motor Check
✅ Table & Extension Leveling
✅ Bevel & Height Calibration
It’s free. Just click, print, and tune.
Over 4,700 woodworkers have used it to transform their saws — and their confidence.
Final Thoughts: Precision Is a Practice, Not a Purchase
You didn’t need a $200 tool to fix your saw.
You didn’t need a degree in mechanical engineering.
You just needed a method — clear, repeatable, and proven.
That’s what table saw blade alignment without dial indicator is all about: empowering you to take control of your tools, your results, and your craft.
Keep this guide bookmarked. Revisit it every 6 months. Teach it to a friend.
Because in woodworking, precision isn’t about perfection — it’s about consistency. And consistency is what turns “meh” projects into pieces you’re proud to sign.
Got Questions? I’ve Got Answers.
Stuck on a step? Not sure which bolt to turn? Send me a photo — I’ll talk you through it.
Email: daniel@hmzwoodz.com
Pintrest: hmzwoodz
Medium: HMZ Woodz
Pin This for Later (Or Share With a Frustrated Friend)
If this guide saved you time, money, or sanity — pass it on. The more precise woodworkers we have in the world, the better.