Table Saw Blade Wobble Test (Without Dial Indicator): The $3 DIY Method
I still remember the first time I noticed my cuts weren’t clean.
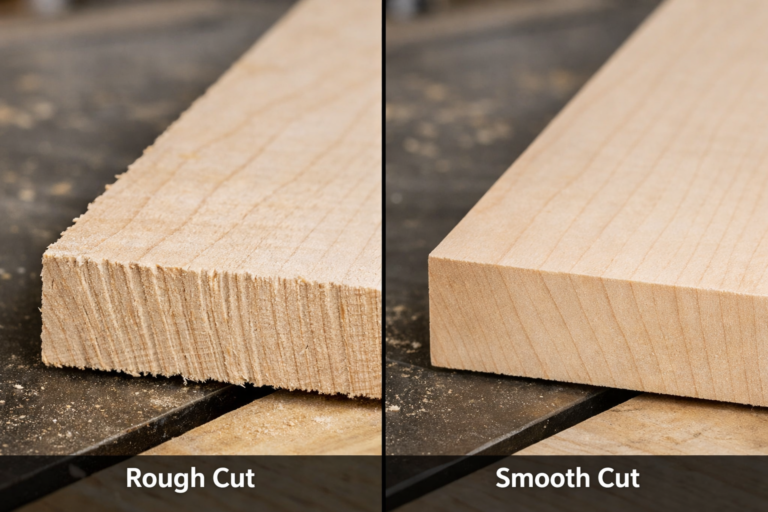
It wasn’t obvious at first—just a slight roughness on the edge that I blamed on my blade being dull. I replaced the blade, thinking that would solve it. Same problem. I checked my fence alignment, verified my blade height, even cleaned my table surface thoroughly. Nothing worked.
Then one evening, while making a simple crosscut on maple, I noticed something strange: the blade seemed to be vibrating more than usual. When I ran my finger along the cut edge, I could feel tiny ridges—like someone had drawn a fine-toothed comb across the wood.
That’s when I realized: my blade wasn’t just dull—it was wobbling.
Most beginners assume that if their saw cuts straight, everything is fine. What I discovered is that even tiny amounts of blade wobble—less than the thickness of a human hair—can ruin your cuts, create dangerous vibrations, and make your projects look amateurish.
The problem? Professional dial indicators cost $100 or more, and most hobbyists don’t have one lying around. But here’s the good news: you can test your blade wobble accurately with just $3 worth of hardware store supplies.
If you’re tired of rough cuts, excessive vibration, or wondering why your expensive blades aren’t performing as expected—this guide is your solution. In under 10 minutes, you’ll know exactly how much your blade is wobbling and whether it needs attention.
Let’s eliminate guesswork and get your saw running smooth again.
🎯 Stop. Get the Foundation First.
Before you test your blade wobble, understand this fundamental truth: proper blade alignment prevents dangerous vibrations and ensures clean, precise cuts.
I’ve created a FREE printable “Dead-Square Every Time” Table Saw Tune-Up Checklist that walks you through every critical alignment step in just 15 minutes.
Download it now, print it, and tape it to your saw. It’s the same checklist I use in my shop before every major project—and it ensures every piece you cut starts with precision and safety.
Why Understanding Table Saw Blade Wobble Matters More Than You Think
Most woodworkers focus on blade sharpness and fence alignment while ignoring the invisible killer: Total Indicated Runout (TIR)—the technical term for blade wobble.
Here’s what nobody tells you about table saw blade wobble: even 0.005 inches of runout can cause noticeable problems:
- Rough, uneven cut edges that require excessive sanding
- Increased vibration that stresses your saw’s motor and bearings
- Premature blade dulling from inconsistent cutting forces
- Dangerous kickback potential from uneven cutting pressure
I learned this the hard way after replacing three premium blades in one month, thinking they were defective. My mentor finally showed me how to check for wobble, and I discovered my arbor flange was slightly bent—not the blades themselves. That single realization saved me hundreds in unnecessary blade replacements.
💡 Daniel’s Reality Check: I once spent $120 on a premium carbide blade, only to have it perform worse than my $25 combo blade. After testing for wobble, I discovered my arbor nut wasn’t tightened properly, causing 0.012″ of runout. Once I fixed the mounting issue, the expensive blade performed perfectly. Sometimes the problem isn’t the blade—it’s how it’s installed.
What Is Blade Wobble (TIR) and Why It Ruins Your Cuts
Total Indicated Runout (TIR) is the total movement of your blade as it spins—one side moves closer to your fence while the other moves away. This creates inconsistent cutting forces that manifest as rough edges, burning, and vibration.
The physics behind the problem:
When your blade wobbles, each tooth takes a slightly different bite of wood. Some teeth cut deeper than others, creating those telltale ridges on your cut edges. At 3,450 RPM, this inconsistency happens thousands of times per second, creating vibrations that travel through your entire saw.
Common causes of blade wobble:
- Improper blade mounting (most common)—blade not fully seated on arbor, arbor nut not tight enough
- Bent arbor flange—metal flange that sandwiches the blade becomes warped from overtightening
- Poor quality blades—inexpensive blades often have manufacturing tolerances that exceed 0.005″
- Dirty arbor surfaces—pitch buildup or debris prevents proper blade seating
- Worn arbor bearings—motor shaft bearings wear over time, allowing lateral movement
Understanding these causes helps you diagnose the real problem instead of just treating symptoms.
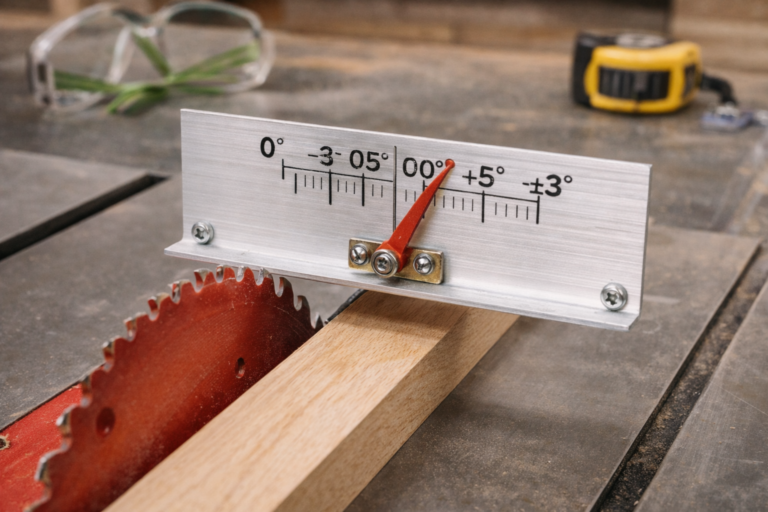
The $3 Aluminum Angle Indicator Method (Step-by-Step)
This method uses a simple piece of aluminum angle stock to create a stable, accurate measurement system that costs less than your morning coffee.
Materials Needed (Total Cost: $3.47)
- 1/2″ × 1/2″ aluminum angle stock (12″ length) – $2.99
- Small rare earth magnet (1/4″ diameter) – $0.48
- Digital calipers or precision ruler – Already in your shop
Step-by-Step Setup (5 minutes)
Step 1: Prepare Your Indicator
Cut your aluminum angle to 12″ length using a hacksaw or miter saw. Sand any burrs from the cut edges. Attach the rare earth magnet to one end of the angle stock—this will hold it securely to your saw’s table surface.
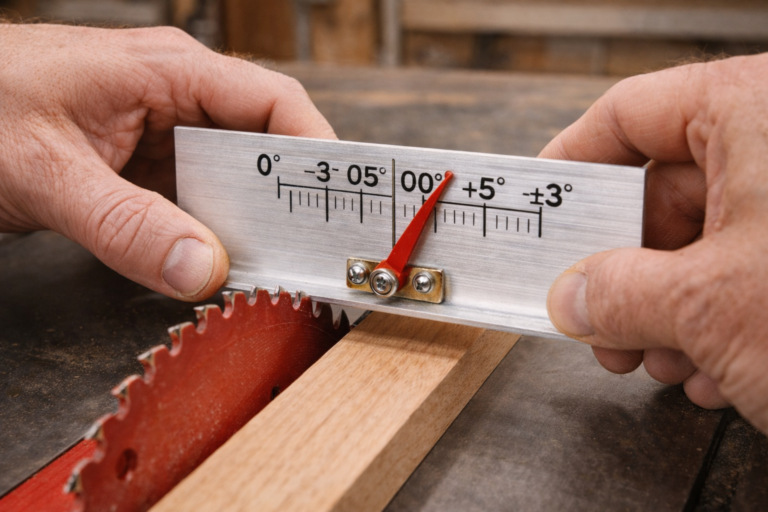
Step 2: Position the Indicator
Place the aluminum angle on your table saw surface so it extends toward the blade. Position it so the vertical leg is approximately 1/16″ away from the blade body (not the teeth). The magnet should hold it firmly in place.
Step 3: Set Your Reference Point
Slowly rotate your blade by hand until one flat section of the blade body is closest to the aluminum angle. Use your digital calipers to measure the exact distance between the blade and the angle stock. Record this measurement.
Step 4: Find Maximum Runout
Continue rotating the blade slowly by hand, watching the gap between the blade and the angle stock. When you find the position where the gap is largest, measure this distance with your calipers.
Step 5: Calculate Total Runout
Subtract your smallest measurement from your largest measurement. This difference is your Total Indicated Runout (TIR).
Pro Tip: Mark the high and low spots on your blade with a Sharpie so you can track whether the wobble is coming from the blade itself or the mounting system.
The Visual Blade Tooth Method (No Tools Required)
If you don’t have aluminum angle stock available, you can use this visual method that requires no additional materials.
Step-by-Step Process (3 minutes)
Step 1: Create a Fixed Reference Point
Place a small block of wood or a combination square against your table saw fence, positioned so it’s just touching the tip of one blade tooth.
Step 2: Rotate and Observe
Slowly rotate your blade by hand, watching how the distance between each tooth and your reference point changes. Look for the tooth that sticks out the farthest and the one that sits closest to the reference.
Step 3: Estimate the Difference
Use a ruler or caliper to estimate the difference between the maximum and minimum positions. While less precise than the aluminum method, this gives you a good indication of whether your runout is within acceptable limits.
Critical Note: This method measures tooth runout rather than blade body runout, but it’s still effective for identifying problematic wobble.
⭐ “I’ve been woodworking for 15 years and never knew my blade was wobbling until I tried Daniel’s $3 method. My cuts went from rough to glass-smooth overnight. That aluminum angle paid for itself in saved sandpaper alone!”
— Mike from Boston
⭐ “As a beginner with a limited budget, I thought I needed expensive tools to get professional results. This simple test showed me that my $80 saw was actually capable of precision work—I just needed to mount the blade properly. Now my projects look like they came from a cabinet shop.”— Sarah from Portland
Interpreting Your Results: What Numbers Mean
Understanding your measurements is crucial for knowing when to take action:
0.000″ – 0.002″ TIR: Excellent
Your blade is running true. No action needed—enjoy your precision cuts.
0.003″ – 0.005″ TIR: Good
Acceptable for most woodworking applications. Monitor for changes over time.
0.006″ – 0.010″ TIR: Problematic
Will cause noticeable cut quality issues. Requires investigation and correction.
Over 0.010″ TIR: Dangerous
Creates excessive vibration and safety hazards. Do not operate your saw until corrected.
Pro Insight: Most quality table saws should maintain under 0.005″ TIR when properly maintained. If you’re consistently measuring over 0.008″, there’s likely an underlying mechanical issue that needs addressing.
How to Fix Common Blade Wobble Problems
Once you’ve identified your runout amount, here’s how to address the most common causes:
Fix #1: Improper Blade Mounting
Symptoms: Runout disappears when you remount the blade
Solution:
- Unplug your saw completely
- Remove the blade and clean the arbor surfaces with denatured alcohol
- Reinstall the blade, ensuring it’s fully seated against the arbor flange
- Tighten the arbor nut firmly (but don’t overtighten—this can warp the flange)
- Re-test for runout
Fix #2: Bent Arbor Flange
Symptoms: Runout remains consistent regardless of blade orientation
Solution:
- Remove the arbor flange and inspect it on a known-flat surface
- If warped, replace the flange (most saws have affordable replacement parts)
- When reinstalling, tighten the arbor nut gradually and evenly
- Never use an impact wrench or cheater bar on your arbor nut
Fix #3: Poor Quality Blades
Symptoms: Runout varies significantly between different blades
Solution:
- Test multiple blades to isolate the problem
- Return or replace blades with excessive manufacturing runout
- Invest in quality blades from reputable manufacturers (Forrest, Freud, Amana)
- Store blades properly to prevent warping during storage
Fix #4: Dirty Arbor Surfaces
Symptoms: Runout improves after cleaning but returns quickly
Solution:
- Clean arbor surfaces regularly with denatureed alcohol
- Remove pitch buildup with citrus-based cleaners
- Apply a light coat of paste wax to arbor surfaces to prevent corrosion
- Check for burrs or damage on arbor threads
Advanced Wobble Testing Techniques
Once you’ve mastered the basic methods, these professional techniques will give you even more insight into your saw’s performance:
The Two-Point Measurement System
Instead of measuring at just one point on the blade, take measurements at both the top and bottom of the blade body. This helps you determine whether your arbor is bent or if the issue is isolated to the mounting surfaces.
The Blade Rotation Test
Mark your blade and arbor with alignment marks, then test runout. Rotate the blade 180 degrees on the arbor and retest. If the high spot moves with the blade, the blade itself is the problem. If the high spot stays in the same position, the arbor or flange is the issue.
The Vibration Analysis Method
Place your smartphone with a vibration analysis app on your saw’s table while running at operating speed. Compare vibration levels before and after addressing runout issues. This gives you objective data about your saw’s performance improvement.
How This Blade Wobble Test Fits Into Your Complete Workshop System
Understanding table saw blade wobble isn’t just about fixing one problem—it’s about building a comprehensive maintenance system that keeps your entire workshop running smoothly.
When you combine this simple test with proper fence alignment procedures and regular blade maintenance, you create a foundation for precision that affects every project you build.
This is exactly what Chapter 2 of The Table Saw Master’s Playbook covers in complete detail—how to build a comprehensive maintenance system that includes blade testing, fence calibration, and alignment verification. When your saw runs true, your confidence soars and your projects succeed.
Frequently Asked Questions About Blade Wobble Testing
Can I use a steel ruler instead of aluminum angle stock?
How often should I test my blade for wobble?
Does blade wobble affect safety as well as cut quality?
Ready to Eliminate Blade Wobble Forever?
Perfect table saw blade wobble test understanding isn’t about having expensive diagnostic tools—it’s about knowing how to use simple, affordable methods to maintain precision. When your blade runs true, everything becomes easier: cuts are cleaner, safety is guaranteed, and your confidence soars.
I used to blame my blades for poor performance, replacing them unnecessarily and wasting money. Now, with this simple $3 test as my foundation, I actually look forward to maintaining my saw. The difference isn’t better equipment—it’s better diagnostic habits.
Remember that rough-cut maple board that frustrated me for weeks? Last month, I rebuilt the exact same project using the methods in this guide. Every cut was smooth. Every edge was clean. Every piece fit together perfectly.
The Dead-Square Every Time Table Saw Tune-Up Checklist
The real secret to smooth, precise cuts isn’t luck—it’s system.
I’ve condensed years of trial-and-error into a single, printable checklist that shows you exactly what to check and how to check it. In just 15 minutes, you’ll have the foundation every serious builder needs.
It’s the same checklist I use in my shop every single week.
Download it today, print it out, and tape it to your shop wall. By this weekend, you’ll see the difference.
Because you didn’t get into woodworking to fight your tools. You got into it to build something beautiful.
Let’s make sure your tools help—not hinder—that mission.