Complete Workshop Setup for Under $500: The Beginner’s Blueprint
I’ll never forget the day I spent $1,200 on “essential” tools… and still couldn’t build a simple shelf.
Why? Because I bought everything at once — without a plan.
A fancy miter saw I never used.
A router table that gathered dust.
A dust collector too big for my garage.
All while my table saw sat on the floor, untuned and unsafe.
That’s when I realized:
A great workshop isn’t about how much you spend. It’s about what you buy — and when.
After 15 years of teaching beginners, I’ve helped hundreds build fully functional workshops for under $500.
And today, I’m giving you the exact 4-phase blueprint — with real prices, real priorities, and real results.
No fluff. No “maybe this’ll work.” Just a proven path to a workshop that actually works.
Why Most Beginners Blow Their Budget (Before They Cut a Single Board)
Most new woodworkers make one of three mistakes:
- They buy tools before space → No layout = chaos
- They skip safety → One injury = $1,000+ in medical bills
- They buy “nice-to-haves” first → Fancy tools sit unused while basics are missing
But the real secret?
Build in phases.
Spend only what you need — when you need it.
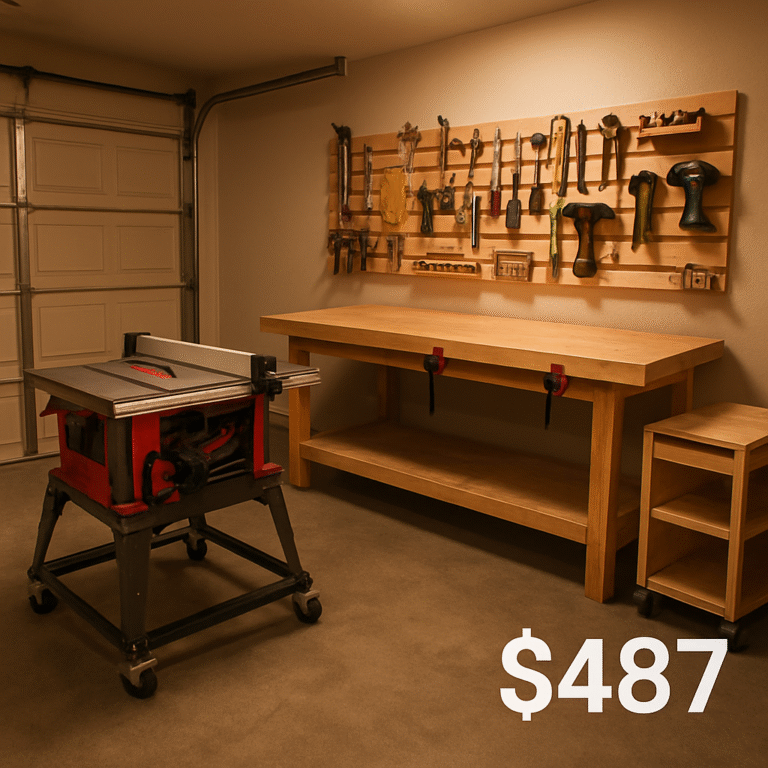
The 4-Phase $500 Workshop Blueprint
This isn’t theory. It’s the exact system I used in my first shop — and teach to every student.
Total cost: $487 (as of 2025 prices).
Phase 1: Essential Tools ($200)
What you need to cut, shape, and assemble:
- Table Saw: Used contractor saw — $150 (Craigslist/FB Marketplace)
- Drill/Driver: Basic cordless kit — $30
- Random Orbital Sander: $20
- Clamps: 4x pipe clamps — $10
- Safety Glasses + Hearing Protection: $10
🧑🔧 Daniel’s Story: I bought my first table saw used from a retiree. He’d maintained it perfectly. Cost: $140. I still have it today — 12 years later.
📌 Before you buy, read our guide to Contractor vs. Cabinet Saw .
Phase 2: Workspace Setup ($150)
What you need to work safely and efficiently:
- Workbench: Build from 2x4s + plywood — $40
- Mobile Base: For table saw — $25 (casters + plywood)
- French Cleat Wall: Scrap plywood + screws — $15
- Lighting: 2x LED shop lights — $40
- Extension Cords + Power Strip: $30
Pro Tip: Your workbench doesn’t need to be fancy. It needs to be flat, stable, and at the right height (elbow level when standing).
Phase 3: Safety & Organization ($100)
What you need to stay safe and sane:
- Push Sticks: Build from scrap — $0
- Dust Mask + Respirator: $25
- First Aid Kit: $15
- Rolling Scrap Cart: Plywood + casters — $30
- Tool Wall Rack: Plywood + hooks — $30
Safety Insight: Your most expensive tool is your body. Protect it first.
📌 For a full safety system, see our Woodworking Shop Safety Guide .
Phase 4: Growth Planning ($37)
What you need to keep improving:
- The Table Saw Master’s Playbook: $37
→ 42 jigs, setup guides, safety protocols, and organization systems
→ Pays for itself in saved lumber and time
Where to Buy (New vs. Used vs. DIY)
Item | Best Source | Why |
|---|---|---|
Table Saw | Used (Craigslist) | Avoids beginner depreciation |
Drill/Driver | New (Home Depot) | Battery tech matters |
Workbench | DIY | Custom size, saves $100+ |
Clamps | Used or Harbor Freight | Function over brand |
Safety Gear | New (Amazon) | Don’t risk cheap protection |
Rule: Buy used tools. Build your furniture. Invest in safety.
12-Month Upgrade Path (Grow Without Going Broke)
- Month 3: Add router ($80 used)
- Month 6: Build router table ($25 DIY)
- Month 9: Upgrade dust collection ($100)
- Month 12: Add cabinet saw (sell contractor saw to fund it)
This keeps you building — not broke.
Real Results: Maria’s $487 Workshop
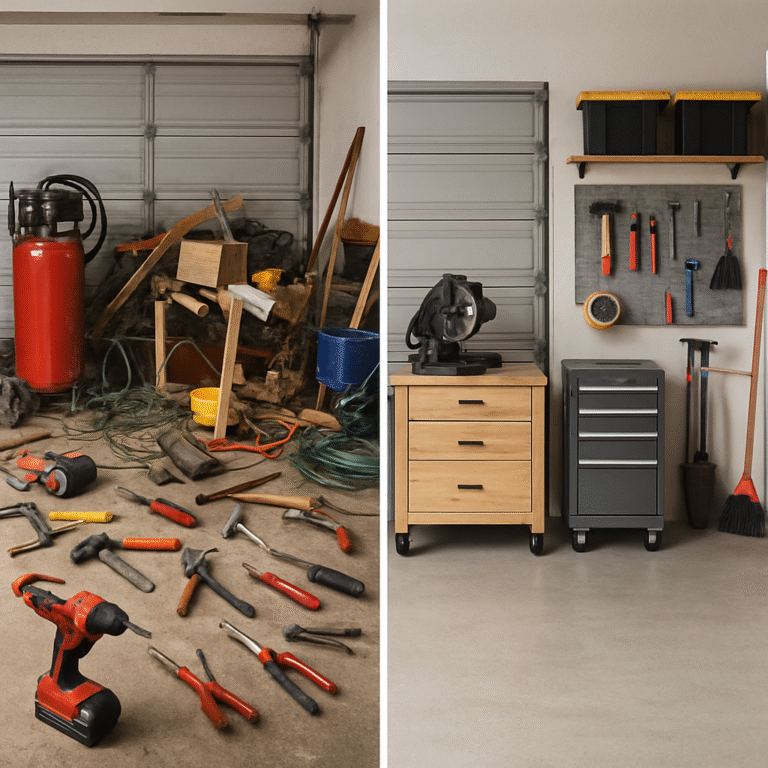
Maria, a student of mine, started with a bare garage and $500.
We followed this blueprint:
- Phase 1: Used table saw + drill
- Phase 2: DIY workbench + mobile base
- Phase 3: French cleat wall + safety gear
- Phase 4: The Playbook ($37)
Result:
- Built her first commissioned piece in 6 weeks
- Saved $700 vs. buying new
- Zero injuries in 18 months
“I finally feel like a real woodworker.”
Common Mistakes to Avoid
❌ Buying a “starter kit” → Most are junk
❌ Skipping the workbench → No flat surface = no precision
❌ Ignoring dust collection → Health hazard + poor cuts
❌ Buying before planning → Leads to clutter and wasted money
Your Workshop Doesn’t Need to Be Fancy — It Needs to Be Yours
Some of my best work came from that half-garage with the Honda Civic parked next to my saw.
The limits forced me to be smarter.
To plan better.
To respect the craft.
You don’t need $2,000.
You just need a smart plan.
Start with Phase 1 this weekend.
Then come back for Phase 2.
Because a calm shop isn’t a luxury.
It’s where good work begins.
🛠️ One Last Step Before You Buy
No matter which tools you choose, your table saw is the heart of your shop.
And if it’s not tuned, nothing else matters.
That’s why I created the FREE “Dead-Square Every Time” Table Saw Tune-Up Checklist.
It’s a 15-minute guide to calibrating your saw for perfect 90° cuts — no dial indicator needed.
It’s the first step to a better shop — and better projects.
Let’s build something great — together.
— Daniel
HMZ Woodz