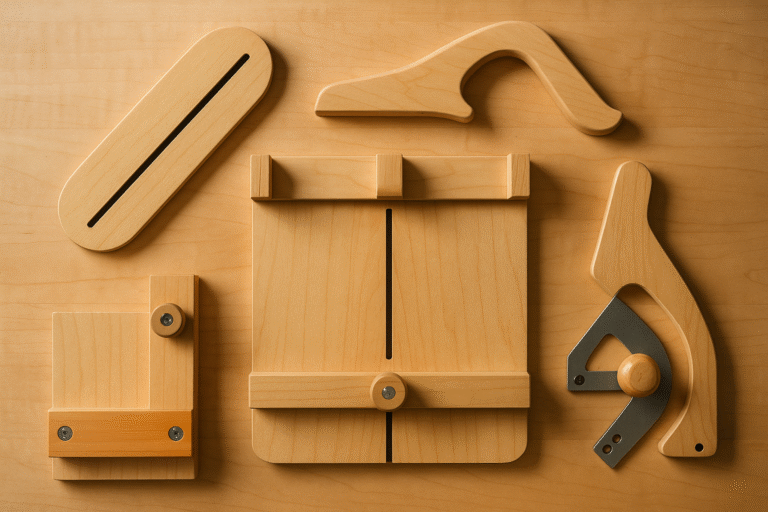
5 Essential Table Saw Jigs Every Beginner Should Build First (Under $20 Each)
You know that feeling?
You’ve got a project in mind. You’ve cut your pieces. You’re ready to assemble.
But your cuts aren’t square.
Your edges are chipped.
Your narrow rip nearly took your finger.
And you think: “If only I had the right tool…”
I’ve been there.
In 2015, I blew $180 on a “premium” crosscut sled. It wobbled. The fence wasn’t square. I returned it.
Then I built my own — from scrap plywood and a few screws.
Cost? $8.
Result? Perfect 90° cuts. Every time.
That’s when I realized: you don’t need expensive tools. You need smart jigs.
Jigs are your secret weapon.
They turn your basic table saw into a precision machine.
They keep your fingers safe.
They save you money.
And the best part? You can build the most essential ones for under $20 each.
Today, I’m giving you the exact 5 jigs I recommend to every beginner student — with simple plans, material lists, and why each one matters.
Total investment? $25.
Store-bought equivalent? $200+.
Let’s build your confidence — and your workshop — the smart way.
Why These 5 Jigs Will Transform Your Woodworking
Before we jump in, let’s be clear:
These aren’t “nice-to-haves.”
They’re non-negotiables for safe, accurate, repeatable work.
- Zero-Clearance Insert: Stops chip-out on veneers and melamine.
- Push Stick Pro: Keeps your fingers 6 inches from the blade — always.
- Crosscut Sled: Guarantees perfect 90° crosscuts (no more measuring twice).
- Thin Rip Guide: Makes narrow cuts safe (no more kickback nightmares).
- Miter Gauge Upgrade: Gives you precise, repeatable angles (no more guessing).
Build these — and you’ll outperform 90% of beginners with “pro” tools.
Jig #1: Zero-Clearance Insert ($3 Build)
What it solves: Tear-out on the bottom of your cuts — especially with plywood or veneers.
Why it works: The insert supports the wood fibers right next to the blade, so they don’t splinter.
Materials:
How to build it:
- Remove your existing throat plate.
- Place a piece of scrap plywood over the opening.
- Turn on your saw and slowly raise the blade through the plywood.
- Turn off saw. Remove insert. Sand edges smooth.
- Drop it into place.
🧑🔧 Daniel’s Story: I ruined a $60 sheet of birch plywood on my first cabinet project — all because of tear-out. I built this insert that night. Haven’t had a chip-out since.
Jig #2: Push Stick Pro ($5 Build)
What it solves: Getting your hand too close to the blade during narrow cuts.
Why it works: It gives you leverage and control — without risking your fingers.
Materials:
- Scrap ¾” hardwood (6” x 3”)
- Drill + ¼” bit
- Sandpaper
How to build it:
- Cut a “hook” shape: 6” long, 3” wide at base, tapering to 1” at top.
- Drill a finger hole near the top.
- Sand all edges smooth (no splinters!).
- Use it on every rip cut under 6” wide.
Safety Rule: If your hand is within 6 inches of the blade, you need a push stick. No exceptions.
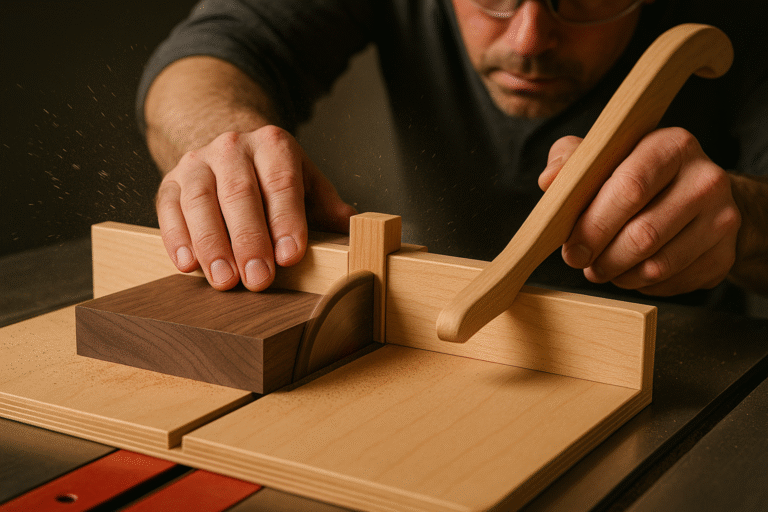
Jig #3: Crosscut Sled Basic ($8 Build)
What it solves: Inaccurate crosscuts, uneven ends, and measuring errors.
Why it works: It slides in your miter slot, so your cut is always perpendicular to the blade.
Materials:
- ½” plywood (12” x 24”)
- ¾” hardwood runners (for miter slots)
- Wood glue, screws
- Square
How to build it:
- Cut base from plywood.
- Attach hardwood runners to the bottom (fit snug in miter slots).
- Glue a ¾” fence to the back, perfectly square to the blade.
- Test with a 5-cut method (or use your combination square).
Pro Tip: Add a stop block for repeatable cuts. Game-changer for shelves or boxes.
Jig #4: Thin Rip Guide ($2 Build)
What it solves: Dangerous narrow rips that can cause kickback.
Why it works: It acts as a zero-clearance fence on the left side of the blade, trapping the offcut.
Materials:
- Scrap ¾” hardwood (12” long)
- Clamp
How to build it:
- Clamp a straight scrap board to the left of your blade, just wider than your cut.
- Feed your workpiece between the fence and the guide.
- The offcut is trapped — no kickback.
🧑🔧 Daniel’s Story: I once had a ½” offcut shoot across my shop like a bullet. Scared me straight. Now, I never rip narrow stock without this guide.
Jig #5: Miter Gauge Upgrade ($7 Build)
What it solves: Wobbly, inaccurate miter cuts.
Why it works: Adds a long fence to your miter gauge, so your workpiece doesn’t pivot.
Materials:
- Scrap ¾” plywood (6” x 18”)
- Wood screws
- Your existing miter gauge
How to build it:
- Drill holes in the plywood to match your miter gauge’s mounting slots.
- Screw it to the face of the gauge.
- Add a stop block for repeatable cuts.
Result: Perfect 45° miters for picture frames. Clean dados. Accurate angles.
Total Investment: $25 vs $200+ Store-Bought
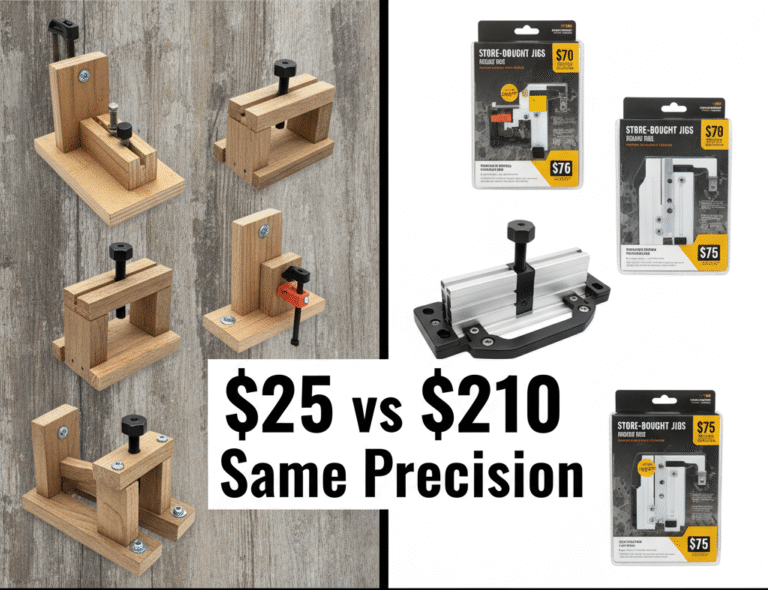
Let’s break it down:
Jig | DIY Cost | Store-Bought Cost |
|---|---|---|
Zero-Clearance Insert | $3 | $25 |
Push Stick Pro | $5 | $30 |
Crosscut Sled | $8 | $80 |
Thin Rip Guide | $2 | $20 |
Miter Gauge Upgrade | $7 | $45 |
TOTAL | $25 | $200+ |
You’re not just saving money.
You’re building skills, confidence, and pride.
And you’re proving something important:
You don’t need expensive tools to build beautiful things.
You just need to be smart.
Common Mistakes Beginners Make (And How to Avoid Them)
❌ Skipping the test cut → Always test your jig on scrap wood first.
❌ Using warped wood for jigs → Jigs must be flat. Use quality plywood or hardwood.
❌ Ignoring safety → If a jig feels unsafe, stop. Redesign it.
❌ Overcomplicating → Start simple. Add features later.
❌ Not labeling jigs → Use a Sharpie: “Crosscut Sled,” “Thin Rip Guide.” Saves time.
Wrapping It Up: Your Workshop, Your Rules
These 5 jigs aren’t the end.
They’re the beginning.
The foundation.
The first step toward a workshop where:
- Every cut is accurate.
- Every project is safe.
- Every tool is an extension of your skill.
Build them this weekend.
Use them on your next project.
Feel the difference.
Then — when you’re ready for more — I’ve got something for you.
🛠️ Ready for the Full System?
These 5 jigs are powerful.
But they’re just the start.
In The Table Saw Master’s Playbook, I’ve included 42 professional-grade jigs — with full plans, cutting lists, and video demos.
Jigs for:
- Perfect box joints
- Flawless tapers
- Dovetails on your table saw
- And 38 more
All designed to work with your existing tools.
All built from scrap wood.
All for $37.
Or if you’re not ready to buy…
👉 Download Our Free Jig Blueprint Pack
Let’s build something great — together.
— Daniel
HMZ Woodz