Table Saw Alignment: The Professional 5-Cut Method That Guarantees Dead-Square Every Time
I still remember the shame of handing my first real woodworking project to my father-in-law. I’d spent three weekends building a beautiful cherry bookshelf, but when he put it together, the shelves wouldn’t sit flush. Gaps that I’d tried to hide with excessive glue and clamping pressure were obvious to everyone.
That day, I learned a brutal truth: No amount of sanding can fix a poorly aligned table saw.
I spent years chasing perfect joints while ignoring the foundation of every cut I made. I’d blame my technique, my wood selection, even my measuring tape—anything but face the truth that my saw itself was the problem.
What finally changed everything wasn’t buying a new saw—it was learning the professional 5-cut alignment method that cabinet shops have used for decades. The same method that transformed my frustrating, gap-filled projects into tight-joint masterpieces overnight.
If you’re tired of forcing pieces together, wasting expensive lumber, or avoiding joinery altogether because your cuts aren’t square—this guide is your turning point.
You’ll learn the exact process I use in my own shop, refined through thousands of cuts and hundreds of projects. No vague advice. No “close enough” measurements. Just the proven system that guarantees dead-square cuts every single time.
Let’s get your saw dialed in—once and for all.
🎯 Stop. Get the Foundation First.
Before you waste another project chasing “almost square” cuts, understand this fundamental truth: perfect joints start with perfect table saw alignment.
I’ve created a FREE printable “Dead-Square Every Time” Table Saw Tune-Up Checklist that walks you through every critical step in just 15 minutes.
Download it now, print it, and follow along as you read. It’s the same checklist I use in my shop every single week.
Why Table Saw Alignment Matters More Than You Think
Most woodworkers assume that once they buy a quality saw, it’ll stay accurate forever. Nothing could be further from the truth.
Your saw is a dynamic system—not a static machine. Every time you move it (even slightly), adjust the blade height, or change the fence position, you’re introducing variables that affect cut quality. Temperature changes in your shop cause subtle shifts. Regular use wears components. Even the vibration from cutting can slowly misalign critical components.
I learned this the hard way after moving my cabinet saw to accommodate a new dust collection system. I assumed everything was fine until I noticed my miter joints were consistently off by about 1/32″. That tiny error meant every frame I built had visible gaps. After weeks of frustration, I finally realized my blade-to-slot alignment had shifted by just 0.004″—barely the thickness of a business card, but enough to ruin precision work.
The real cost of poor table saw alignment:
- Wasted lumber from ruined projects
- Hours lost sanding and forcing pieces together
- Frustration that kills your motivation to build
- Avoidance of complex projects requiring precision
When I finally mastered professional table saw alignment techniques, it transformed not just my projects but my entire woodworking experience. Suddenly, complex joinery became achievable. My confidence soared. And most importantly, I started enjoying the process again instead of fighting my tools.
The 5-Cut Alignment Method: Your Path to Perfect Accuracy
This isn’t some theoretical concept—it’s the exact method professional cabinet shops use to guarantee precision. What makes it so powerful is its simplicity. You don’t need expensive dial indicators or specialized tools. Just a reliable square, a sharp pencil, and about 30 minutes of focused time.
The beauty of this approach to table saw alignment is that it measures cumulative error rather than individual components. Instead of checking blade-to-slot and fence-to-slot separately, it evaluates how all parts work together during actual cutting. This eliminates guesswork and gives you real-world accuracy.
Tools You’ll Need:
- Reliable combination square (I recommend a 12″ Starrett or similar quality)
- Sharp pencil or marking knife
- Straight-edged scrap board (at least 12″ wide and 24″ long)
- Tape measure or caliper
- Calculator
- Clean rags and cleaning solution
The Setup: Preparing for Precision
Before we begin the 5-cut method, prepare your saw properly:
Clean your table thoroughly – Remove all sawdust, pitch buildup, and debris from the table surface, miter slots, and fence rails. Even small particles can throw off your measurements.
Check blade condition – A dull or damaged blade won’t cut cleanly, making accurate measurement impossible. Install a sharp, high-quality blade with minimal runout.
Verify fence security – Ensure your fence locks down firmly without any play or wobble. If your fence shifts during cutting, no alignment method will work.
Warm up your saw – Run the saw for 2-3 minutes before starting. This allows components to reach operating temperature and settle into their natural positions.
💡 Daniel’s Reality Check: I once spent an entire Saturday trying to align my saw in a cold garage during winter. No matter what I did, the measurements kept changing. When I moved the same saw to a heated shop and repeated the process, it aligned perfectly in 20 minutes. Temperature matters more than most guides will tell you.
The 5-Cut Method: Step-by-Step Execution
Step 1: Prepare Your Test Board (5 minutes)
Select a straight, flat board that’s at least 12″ wide and 24″ long. Hard maple or poplar works best because they’re stable and show cut lines clearly.
Cut one edge straight – Using your current fence setting, rip one edge of the board perfectly straight. Don’t worry about width yet—just focus on creating a clean, straight reference edge.
Flip and cut the opposite edge – Turn the board around and rip the opposite edge, creating a board with two parallel edges. The exact width doesn’t matter—as long as both edges are parallel.
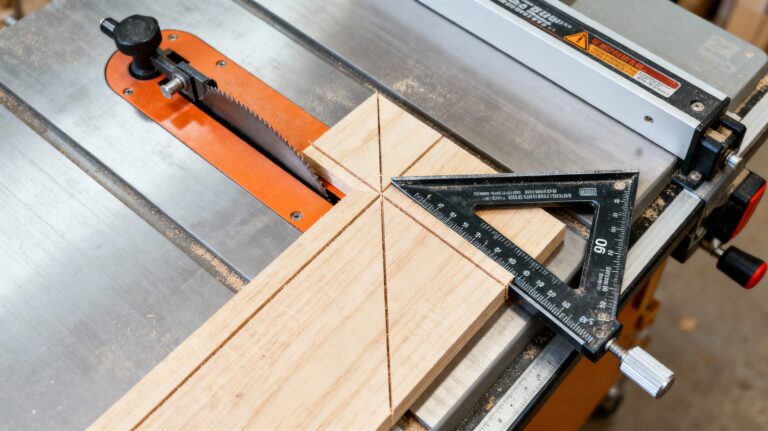
Crosscut one end square – Using your miter gauge, crosscut one end of the board perfectly square. This creates your reference corner for all subsequent measurements.
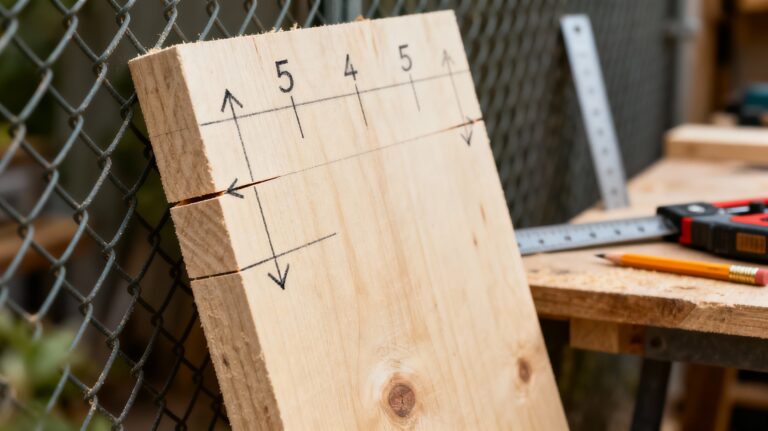
Mark your starting point – With a sharp pencil, draw a line perpendicular to your freshly cut end, about 2″ from the edge.
Step 2: The First Cut (2 minutes)
Position the board against your fence with the freshly crosscut end against the blade. Make your first cut along the pencil line you drew in Step 1. This removes a thin strip from the end of your board.
Step 3: The Critical Sequence (15 minutes)
This is where the magic happens. The next four cuts are what give this method its precision:
Second cut: Without moving your fence, flip the board end-for-end and make another cut along the same edge.
Third cut: Take the small piece you just cut off and flip it over (like turning a page in a book). Place it back against the fence and make another cut. This piece should now be extremely thin—almost like a sliver.
Fourth cut: Measure the thickness of this tiny piece at both ends using calipers or a precision ruler. Record both measurements.
Fifth cut: If your measurements show a difference between the two ends (they almost always do), adjust your fence slightly based on the formula: Fence adjustment = (Width difference ÷ 4) × Board width.
The genius of this method is that it multiplies any error by four, making tiny misalignments obvious and measurable. What might be a 0.001″ error in alignment becomes a 0.004″ difference in your final measurement—easily detectable with basic tools.
Step 3: Verification and Fine-Tuning (8 minutes)
After making your fence adjustment, repeat the 5-cut sequence to verify your changes. Most saws require 2-3 iterations to achieve perfect alignment.
The perfect result: Your final sliver should have identical thickness at both ends. When placed on a flat surface, it shouldn’t rock or show any gaps.
Pro verification technique: After completing the 5-cut method, make a simple test cut on a scrap board. Crosscut it in half, flip one piece, and join them back together. If your table saw alignment is perfect, the two pieces will form a perfectly straight line with no gaps or overlaps.
⭐ “I’d struggled with gaps in my mitered frames for years. Following Daniel’s 5-cut method transformed my table saw alignment in under an hour. My next picture frame had joints so tight I could barely see the glue line. The ROI on that 60 minutes was incredible—no more wasted lumber, no more frustration. I wish I’d learned this years ago.”
— Michael from Austin
⭐ “As a weekend woodworker with limited shop time, precision has always been my biggest challenge. After watching my dovetail joints never quite fitting right, I finally decided to tackle my table saw alignment using this method. The difference was night and day. What used to take me three attempts now happens on the first try. My shop time is actually enjoyable again instead of frustrating.”
— Sarah from Portland
Common Table Saw Alignment Mistakes (And How to Avoid Them)
Even with a proven method like the 5-cut approach, several pitfalls can derail your table saw alignment efforts. I’ve made nearly all of these mistakes myself—and seen students repeat them countless times.
Mistake #1: Measuring Against Blade Teeth Instead of the Blade Body
Why it’s wrong: Blade teeth have “set”—they intentionally bend slightly left and right to clear the kerf. This makes them terrible reference points.
The fix: Always use the flat body of the blade for alignment checks, never the teeth.
Mistake #2: Ignoring the Miter Gauge Slot Alignment
Why it’s wrong: Perfect fence alignment means nothing if your blade isn’t parallel to your miter slots. This creates inconsistencies between crosscuts and rip cuts.
The fix: Before starting the 5-cut method, verify blade-to-slot alignment using the two-point measurement technique described in our table saw tune-up checklist .
Mistake #3: Using a Warped or Twisted Test Board
Why it’s wrong: Your test board must be perfectly flat and straight. Any warp or twist introduces errors that appear to be saw misalignment.
The fix: Select your test board carefully from stable, kiln-dried stock. Check it against a known-flat surface before beginning.
Mistake #4: Rushing the Process on a Cold Saw
Why it’s wrong: Metal expands and contracts with temperature. A cold saw won’t maintain the same alignment as a warm one.
The fix: Run your saw for 3-5 minutes before starting the alignment process. Better yet, perform alignments at the same time of day when your shop temperature is consistent.
Mistake #5: Forgetting to Re-Tighten Fence Locking Mechanisms
Why it’s wrong: Many fence systems shift slightly when you loosen them for adjustment. If you don’t re-secure them properly, your hard work goes to waste.
The fix: After making any fence adjustment, lock it down firmly and re-check your alignment before declaring victory.
Advanced Alignment Techniques for Professional Results
Once you’ve mastered the basic 5-cut method, these advanced techniques will elevate your precision even further:
The Double-Check Method for Critical Projects
For projects requiring absolute perfection (like fine furniture or musical instruments), perform the 5-cut method twice—once in the morning and once in the evening. This accounts for any thermal expansion that might occur throughout your shop day. Compare your results. If they differ by more than 0.001″, your shop environment might need better climate control.
Blade Tilt Verification
After perfecting your 90-degree alignment, verify your 45-degree tilt accuracy using a similar approach. Cut a test piece at 45 degrees, flip it, and check for gaps. Most saws have separate adjustment mechanisms for blade tilt that can drift independently of your main alignment.
Seasonal Maintenance Schedule
Your table saw alignment isn’t a “set it and forget it” task. Create a maintenance calendar:
- Weekly: Quick verification cut on scrap wood
- Monthly: Full 5-cut method check
- Seasonally: Complete alignment including blade-to-slot verification
- After moving your saw: Always re-align completely
Now You’re Ready for the Complete System
You’ve learned the foundation. You understand the alignment method. You know how to set up your saw for dead-square cuts every time.
But here’s the truth: Most woodworkers stop here.
They master the basics… then hit a ceiling. They can make square cuts, but they can’t control their cuts. They have a tuned saw, but they don’t have a SYSTEM.
That’s where The Table Saw Master’s Playbook comes in.
This isn’t just another PDF with plans. It’s the complete, step-by-step system I use to build furniture that actually fits together perfectly, every single time.
You’ll learn: ✓ The 5-cut calibration method (chapter 2) ✓ How to build a professional crosscut sled (chapter 1) ✓ The miter sled that guarantees 45° angles (chapter 3) ✓ Master joinery techniques (chapter 4) ✓ Your capstone project (chapter 5)
Plus you get: Free tune-up checklist + Jig template pack + At-a-glance workshop checklist.
👉 GET THE TABLE SAW MASTER’S PLAYBOOK ($37)
30-Day Money-Back Guarantee | Instant PDF Download | Lifetime Updates
This is the system that will take your workshop from “functional” to “professional.”
Let’s build something beautiful.
Frequently Asked Questions About Table Saw Alignment
Q: How often should I perform the 5-cut alignment method on my table saw?
A: For serious woodworkers, monthly alignment checks are ideal. If you use your saw daily, consider a quick verification cut before each major project. After any shop move or significant temperature change, always re-align. The good news? Each subsequent alignment takes less time as you become familiar with your saw’s tendencies.
Q: Can I use this method on a contractor saw or jobsite table saw?
A: Absolutely! The 5-cut method works on any table saw regardless of type or price point. Contractor saws and jobsite models often benefit the most from regular alignment since their lighter construction makes them more prone to shifting. The only requirement is a fence system that locks down securely.
Q: My fence doesn’t have micro-adjustments. How can I make tiny alignment corrections?
A: Most fences can be adjusted using the mounting bolts or eccentric cams at the rear rail connection. For ultra-fine adjustments, place a thin shim (like a piece of paper or business card) between the fence mounting point and the rail. Test, measure, and remove the shim once you’ve achieved proper alignment. For persistent issues, consider upgrading to a fence with micro-adjustment capabilities.
Q: What if my measurements show perfect alignment but my cuts still aren’t square?
A: This usually indicates issues beyond alignment: a warped test board, blade runout, or operator technique. First, verify your blade is sharp and has minimal runout. Second, ensure you’re feeding wood consistently without twisting or pushing down on the fence. Third, check that your miter gauge is accurate and fits snugly in its slot. Often, these secondary issues are the real culprits behind “mystery” inaccurate cuts.
Q: How precise do my measurements need to be for this method to work?
A: For most woodworking applications, measurements accurate to 0.001″ (one thousandth of an inch) are sufficient. This level of precision is achievable with quality digital calipers or a precise ruler with magnifier. Don’t get paralyzed by perfectionism—getting within 0.002″ will produce excellent results for 99% of projects. Save ultra-fine measurements for instrument building or scientific applications.
Q: Can temperature and humidity really affect my table saw alignment that much?
A: Absolutely. Metal components expand and contract with temperature changes, while wood test boards can warp with humidity shifts. I once tracked my saw’s alignment drift over a single day—measurements in the cool morning differed by 0.003″ from afternoon readings in a non-climate-controlled shop. For critical work, align your saw at the same temperature your projects will be built in, and allow wood to acclimate to your shop environment for at least 48 hours before precision cutting.
Q: Should I align my saw with or without the blade guard and riving knife installed?
A: Always align your saw with all safety equipment installed exactly as you’ll use it for actual cutting. The blade guard and riving knife can affect both blade alignment and wood feed dynamics. Removing them for alignment creates a false baseline that won’t reflect real-world cutting conditions. If your guard interferes with measurements, temporarily remove it for the alignment process, but reinstall and verify before declaring your saw properly aligned.
Ready to Master Your Table Saw Like a Professional?
Perfect table saw alignment isn’t a luxury—it’s the foundation of every great woodworking project you’ll ever build. When your saw cuts dead-square every time, everything else becomes easier: joinery fits perfectly, assembly goes smoothly, and finishing requires minimal correction.
The 5-cut method has transformed thousands of workshops from frustrating to functional. It’s the same technique I use before every major project in my own shop—a quick verification that ensures every cut I make builds upon a foundation of precision.
Remember that bookshelf I built for my father-in-law? Last month, I rebuilt it using the methods in this guide. When he assembled it this time, the shelves slid into place with satisfying precision. No forcing. No gaps. No excuses.
That’s the power of proper table saw alignment.
Now You’re Ready for the Complete System
You’ve learned the foundation. You understand the alignment method. You know how to set up your jigs.
But here’s the truth: Most woodworkers stop here.
They master the basics… then hit a ceiling. They can make square cuts, but they can’t control their cuts. They have jigs, but they don’t have a SYSTEM.
That’s where The Table Saw Master’s Playbook comes in.
This isn’t just another PDF with plans. It’s the complete, step-by-step system I use to build furniture that actually fits together perfectly, every single time.
You’ll learn:
✓ The 5-cut calibration method (chapter 2)
✓ How to build a professional crosscut sled (chapter 1)
✓ The miter sled that guarantees 45° angles (chapter 3)
✓ Master joinery techniques (chapter 4)
✓ Your capstone project (chapter 5)
Plus you get: Free tune-up checklist + Jig template pack + At-a-glance workshop checklist.
👉 GET THE TABLE SAW MASTER’S PLAYBOOK ($37) 30-Day Money-Back Guarantee | Instant PDF Download | Lifetime Updates
This is the system that will take your workshop from “functional” to “professional.”
Let’s build something beautiful.