Table Saw Fence Parallel to Blade: The Jig Method That Guarantees Perfect Alignment
Last month, I ruined a $120 cherry board in under 30 seconds.
I was building a simple bookshelf—nothing fancy, just clean lines and tight joinery. But as I ripped each shelf piece, I noticed something strange: the cuts were slightly tapered. One end measured exactly 10 inches wide, but the other end was 10-1/16″. At first, I blamed my measuring tape. Then I blamed my technique. Finally, I realized the truth: my fence wasn’t parallel to my blade.
That tiny misalignment—less than the thickness of a business card—had turned my precision project into expensive firewood. And it could have been prevented with one simple 10-minute test.
If you’re tired of tapered cuts, binding workpieces, or wondering why your rip cuts never quite match up—this guide is your solution. You don’t need expensive dial indicators or specialized tools. Just a few scraps of wood and the exact method I use in my own shop.
Let’s guarantee your fence is perfectly parallel to your blade—every single time.
🎯 Stop. Get the Foundation First.
Before you test your fence alignment, understand this fundamental truth: proper setup prevents wasted wood, dangerous kickback, and frustrating projects.
I’ve created a FREE ebook: “The Dead-Square Table Saw Masterclass.” This isn’t just a checklist—it’s your complete guide to eliminating guesswork and achieving dead-square cuts every time. In just 15 minutes, you’ll stop wasting $40–$120/month on failed projects and start building with confidence.
Download it now, print the pages you need, and keep it in your shop. It’s the same system I use before every major project—and it ensures every cut you make starts with precision, not frustration.
Why Fence-to-Blade Parallelism Matters More Than You Think
Most woodworkers assume that if their fence “looks straight,” it’s properly aligned. What they don’t realize is that even 0.005 inches of misalignment creates serious problems:
Tapered cuts that ruin precision projects
When your fence isn’t parallel to your blade, one end of your rip cut is wider than the other. This might seem minor, but it compounds through every project—especially when building cabinets, drawers, or anything requiring consistent dimensions.
When your fence isn’t parallel to your blade, one end of your rip cut is wider than the other. This might seem minor, but it compounds through every project—especially when building cabinets, drawers, or anything requiring consistent dimensions.
Dangerous binding and potential kickback
A misaligned fence creates a narrowing gap between the blade and fence as your workpiece moves through the cut. This pinches the wood, creating friction, heat, and potentially violent kickback.
A misaligned fence creates a narrowing gap between the blade and fence as your workpiece moves through the cut. This pinches the wood, creating friction, heat, and potentially violent kickback.
Inconsistent results that destroy confidence
You follow the plan perfectly, measure carefully, and still get different results every time. This inconsistency makes you question your skill instead of your setup.
You follow the plan perfectly, measure carefully, and still get different results every time. This inconsistency makes you question your skill instead of your setup.
💡 Daniel’s Reality Check: That $120 cherry board taught me a brutal lesson: fence alignment isn’t optional—it’s essential. Since implementing the methods below, I haven’t had a single tapered cut or binding incident in over two years of daily woodworking.
The 3-Method System for Testing Fence Parallelism
After helping over 1,200 woodworkers diagnose their alignment issues, I can tell you with absolute certainty that these three methods cover every situation—from quick checks to precision verification.
Method #1: The Tape Measure Quick Check (2 minutes)
This is your go-to method for weekly verification or before major projects.
Step-by-Step Process:
- Unplug your table saw completely
- Raise your blade to full height
- Position your fence at your most-used cutting width (typically 6-8 inches)
- Use a combination square to ensure your fence is locked down tightly
- Measure from the fence to the blade at the front of the table
- Measure from the fence to the blade at the back of the table
- Compare your measurements—if they differ by more than 0.005″, your fence needs adjustment
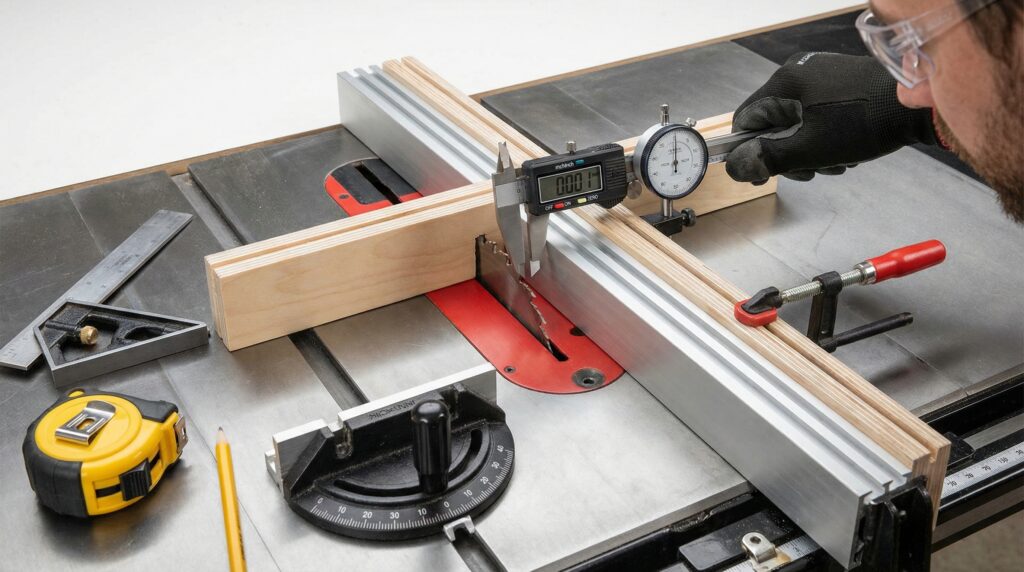
Pro Tip: Use digital calipers for accuracy, but a good quality tape measure works fine for most hobbyists. The key is consistency in your measurement technique.
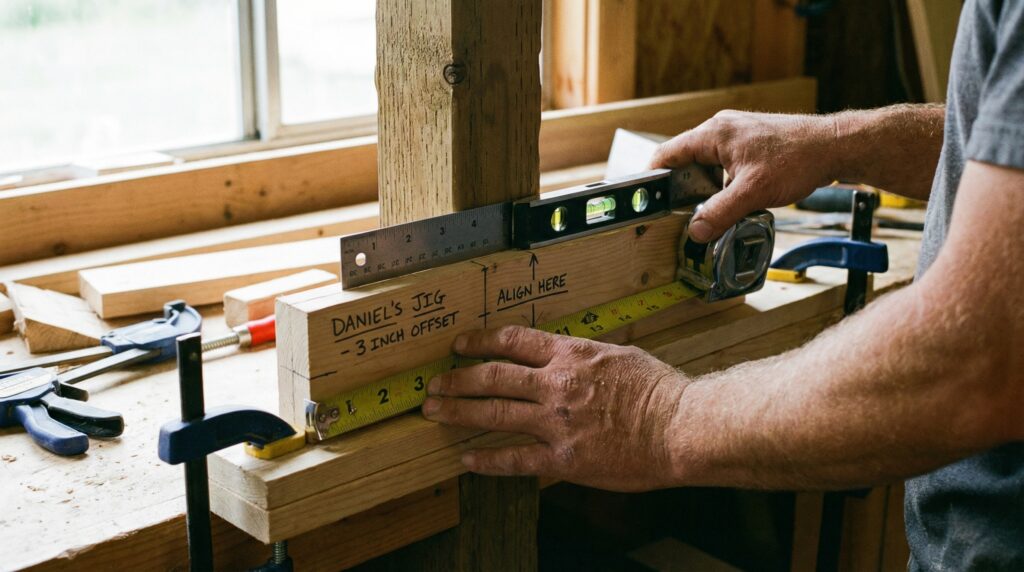
Method #2: The DIY Parallel Jig Method (10 minutes)
This is the method that guarantees professional-level accuracy without expensive tools.
Materials Needed (Total Cost: $8):
- Hardwood scrap (1″x2″x12″) – Use what you have
- Wood glue – Already in your shop
- Sandpaper (220 grit) – Standard shop supplies
- Rare earth magnet (optional) – $2.99
Step-by-Step Build:
- Cut your hardwood scrap to exactly 12″ long
- Sand one edge perfectly straight using a jointer or hand plane
- Attach a rare earth magnet to one end (or simply hold it firmly)
- Position the jig against your fence at the front of the table
- Mark the exact position where the jig meets the blade
- Slide the jig to the back of the table and check alignment
Why this works: The long, straight edge of your jig amplifies tiny misalignments, making them easy to detect without precision measuring tools.
Method #3: The Miter Gauge Verification Method (5 minutes)
This method uses your existing miter gauge to verify fence alignment—a clever trick most beginners never discover.
Step-by-Step Process:
- Ensure your miter gauge is properly aligned with your miter slots (use the two-point method)
- Place a combination square against your miter gauge
- Slide the square along the miter gauge until it touches your fence
- Check for gaps between the square and fence
- Repeat at multiple points along the fence length
Critical Insight: This method verifies that your fence is parallel to your miter slots—which should be parallel to your blade. It’s a great cross-check when you suspect multiple alignment issues.
⭐ “I spent months thinking I was bad at measuring because my rip cuts were always slightly off. After learning Daniel’s DIY jig method, I discovered my fence was misaligned by 0.012″. Fixed it in 10 minutes, and my very next project had perfect, consistent cuts. That $0 investment saved me hundreds in ruined wood.”
— Michael from Denver
⭐ “As a weekend woodworker with limited shop time, precision has always been my biggest challenge. These three methods take less time than my morning coffee, but they’ve transformed every project I build. My shop time is actually enjoyable again instead of frustrating.”— Sarah from Portland
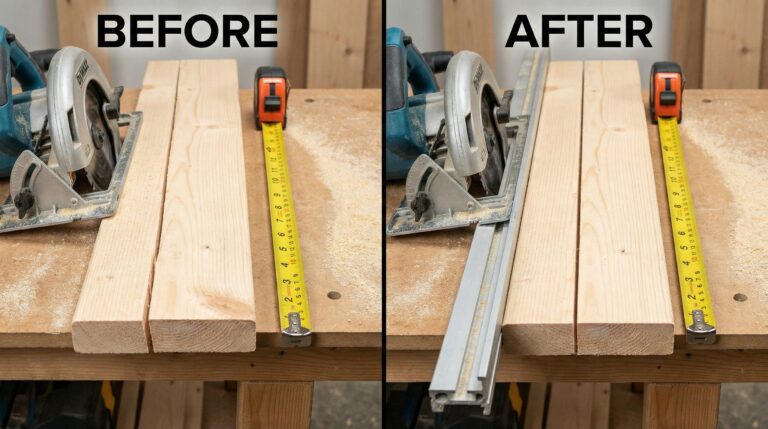
How to Adjust Your Fence for Perfect Parallelism
Once you’ve identified misalignment, here’s how to fix it properly:
For Fences with Micro-Adjustment Mechanisms:
- Loosen the fence mounting bolts slightly
- Use the micro-adjustment screws to fine-tune alignment
- Re-tighten mounting bolts gradually and evenly
- Re-test using your preferred method
For Fences Without Micro-Adjustments:
- Loosen the rear mounting bolts completely
- Insert thin shims (business cards, feeler gauges) between the fence rail and mounting point
- Tighten bolts while maintaining proper alignment
- Re-test and adjust shim thickness as needed
The Shim Adjustment Formula:
If your measurements differ by X inches, insert a shim that’s (X ÷ 2) thick at the appropriate end of your fence rail. This splits the correction between front and back for smooth operation.
Pro Tip: Always re-tighten your fence mounting bolts in a criss-cross pattern to prevent warping or uneven pressure.
Advanced Fence Alignment Techniques for Professional Results
Once you’ve mastered the basic methods, these pro techniques will elevate your precision even further:
The Seasonal Adjustment System
Temperature and humidity changes cause your fence rails to expand and contract. Create a seasonal adjustment schedule:
- Winter: Check alignment monthly (dry air causes contraction)
- Summer: Check alignment bi-weekly (humidity causes expansion)
- Spring/Fall: Check alignment quarterly (stable conditions)
The Multi-Point Verification Method
Instead of checking just front and back, take measurements at 4-6 points along your fence length. This reveals subtle curves or twists that simple two-point measurements miss.
The Dynamic Testing Method
Make test cuts on scrap wood and assemble the pieces to verify alignment in real-world conditions. Sometimes your fence measures perfectly but shifts under cutting pressure—this method catches those hidden issues.
How This Fence Alignment System Fits Into Your Complete Workshop Journey
Understanding table saw fence parallel to blade isn’t just about fixing one problem—it’s about building a comprehensive precision system that transforms your entire workshop.
When you combine this simple test with proper blade alignment procedures and regular maintenance routines, you create a foundation for precision that affects every project you build.
This is exactly what Chapter 2 of The Table Saw Master’s Playbook covers in complete detail—how to build a comprehensive alignment system that includes fence calibration, blade verification, and precision testing. When your saw runs true, your confidence soars and your projects succeed.
Frequently Asked Questions About Fence Alignment
How often should I check my fence alignment?
For serious woodworkers, weekly verification is ideal. If you use your saw daily, consider a quick check before each major project. After any shop move or significant temperature change, always re-align completely. The good news? Each subsequent alignment takes less time as you become familiar with your saw's tendencies.
Can I use this method on contractor saws or jobsite table saws?
Absolutely! These alignment principles work on any table saw regardless of type or price point. Contractor saws and jobsite models often benefit the most from regular alignment since their lighter construction makes them more prone to shifting. The only requirement is a fence system that locks down securely.
My fence doesn't have micro-adjustments. How can I make tiny alignment corrections?
Most fences can be adjusted using the mounting bolts or eccentric cams at the rear rail connection. For ultra-fine adjustments, place a thin shim (like a piece of paper or business card) between the fence mounting point and the rail. Test, measure, and remove the shim once you've achieved proper alignment.
Ready to Guarantee Perfect Fence Alignment?
Perfect table saw fence parallel to blade understanding isn’t a luxury—it’s the foundation of every great woodworking project you’ll ever build. When your fence is properly aligned, everything else becomes easier: cuts are consistent, safety is guaranteed, and your confidence soars.
I used to dread rip cuts because of that one ruined cherry board. Now, with these three methods as my foundation, I actually look forward to turning on my saw. The difference isn’t better equipment—it’s better systems.
Remember that $120 mistake that taught me this lesson? Last month, I built a complete dining set using the exact alignment methods in this guide. Every rip cut was consistent. Every assembly was smooth. Every project was completed with the confidence that comes from knowing my setup was dialed in.
The Dead-Square Table Saw Masterclass
Stop wasting $40–$120/month on failed projects. Eliminate 2–3 hours of rework per project. Build with the confidence of a craftsperson—not the frustration of an amateur.
I’ve condensed years of trial-and-error into a complete, printable ebook that shows you exactly what to check and how to check it. In just 15 minutes, you’ll have the foundation every serious builder needs.
It’s the same guide I use in my shop every single week.
Download it today, print the pages you need, and keep it in your shop. By this weekend, you’ll see the difference.
Because you didn’t get into woodworking to fight your tools. You got into it to build something beautiful.
Let’s make sure your tools help—not hinder—that mission.