Router Safety Mastery: 7 Non-Negotiable Rules Every Beginner Must Know
I’ll never forget the sound it made.
That sickening thwack as my router bit caught the edge of a small workpiece and launched it across my shop like a wooden missile. It shattered against my tool cabinet, sending splinters everywhere. I was lucky—just a few inches to the left, and it would have hit me in the face.
That was my wake-up call.
I’d been so focused on learning fancy cuts and perfecting joinery that I completely ignored the fundamentals of router safety. I thought, “It’s just a router—it can’t be that dangerous.” Famous last words.
What I didn’t understand then—but know with absolute certainty now—is this: Your router isn’t just a tool. It’s a high-speed precision instrument that demands respect. When spinning at 20,000+ RPM, even a small piece of wood can become a dangerous projectile. A moment of carelessness doesn’t just ruin your project—it can ruin your life.
If you’re new to routing or just want to build confidence with this powerful tool, this guide is your safety lifeline. These aren’t just rules—they’re hard-won lessons from hundreds of projects and close calls that could have been much worse.
Let’s build your foundation of router safety—the only way to truly enjoy this incredible tool.
🎯 Stop. Safety First.
Before you make another cut with your router, understand this fundamental truth: proper safety preparation takes two minutes but prevents lifetime regrets.
I’ve created a FREE printable “Router Safety Essentials Checklist” that walks you through every critical safety step before you even plug in your router.
Download it now, print it, and tape it to your workshop wall. It’s the same checklist I use before every routing session—no exceptions.
Why Router Safety Matters More Than You Think
Most beginners focus entirely on technique and results, completely ignoring the critical safety foundation that makes everything else possible. I was no different.
Here’s what nobody tells you about routers:
They’re deceptively dangerous.
Unlike saws where the cutting action is obvious, routers can grab workpieces unexpectedly and launch them with terrifying force. I’ve seen 2x4s become projectiles that embedded themselves in drywall six feet away.
Speed creates invisible hazards.
At 24,000 RPM, your router bit is moving at approximately 60 miles per hour at the cutting edge. That’s faster than most city speed limits—and it’s happening inches from your hands.
Fatigue compounds risk.
Routers are heavy, vibrating tools that tire your arms and hands. After 20 minutes of use, your grip strength can decrease by 30%, making it harder to maintain control during critical moments.
The good news? Perfect router safety isn’t complicated—it’s consistent. It’s about building habits that become automatic, so you never have to think twice about making safe choices.
The 7 Non-Negotiable Router Safety Rules
These aren’t suggestions—they’re the absolute minimum requirements for safe router operation. Break any one of these, and you’re rolling the dice with your safety.
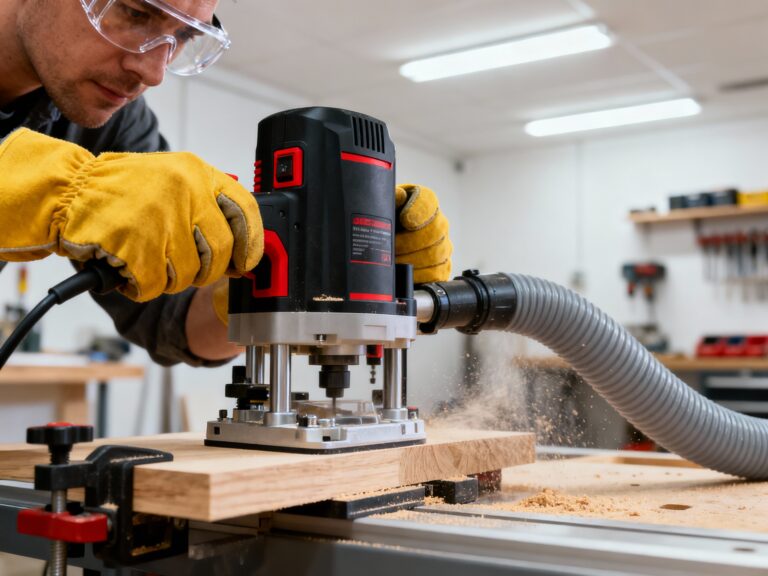
Rule #1: The Two-Hand Grip (Always)
The rule: Both hands on the router at all times during operation—no exceptions.
Why it matters:
Routers generate tremendous torque that can twist unexpectedly in your hands. A two-handed grip provides stability and control that one-handed operation simply cannot match.
Real consequence:
I watched a talented woodworker lose control of his router during a simple edge profile. With only one hand on the tool, it twisted violently and his thumb met the spinning bit. He was lucky to only need eight stitches.
The fix:
Practice your grip position before turning on the router. Your dominant hand controls the trigger and depth, while your support hand stabilizes the base. Neither hand ever leaves the router during operation.
Rule #2: Secure Your Workpiece (Like Your Fingers Depend On It)
The rule: Every workpiece must be securely clamped or held in a jig before routing begins.
Why it matters:
An unsecured workpiece can shift, vibrate, or get grabbed by the bit—turning it into a dangerous projectile. Proper securing also ensures consistent, accurate cuts.
Real consequence:
Early in my career, I tried to “just quickly” round over an edge while holding a small piece in my hand. The router grabbed the wood, spun it around, and launched it into my forearm. The resulting gash required a trip to the emergency room and taught me a brutal lesson about workpiece security.
The fix:
Invest in quality clamps ($2-3 each at Harbor Freight) and use them liberally. For small pieces, build or buy a dedicated jig that holds workpieces securely away from the bit.
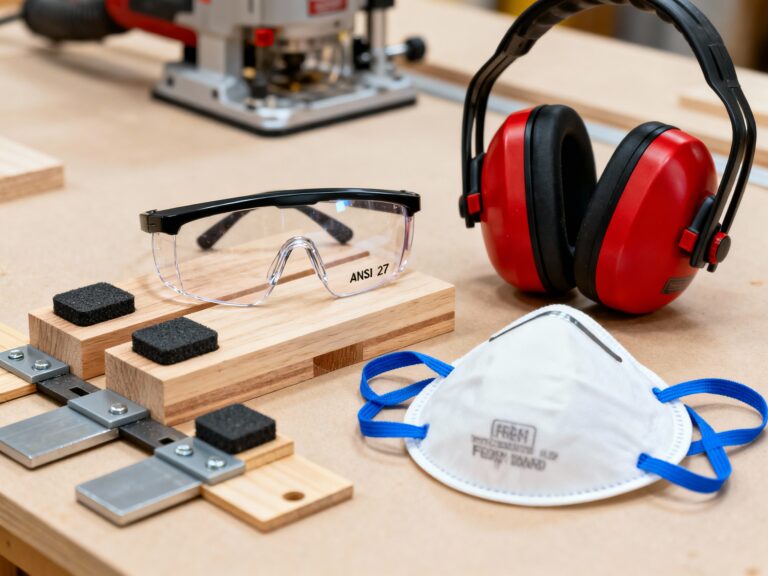
Rule #3: PPE Is Non-Negotiable (Every Single Time)
The rule: Safety glasses, hearing protection, and dust mask must be worn for every routing operation—without exception.
Why it matters:
Router operations create high-velocity chips, extreme noise levels (85-102 dB), and fine airborne particles that can cause permanent damage over time.
Pro insight:
Standard safety glasses aren’t enough for routing. You need ANSI Z87-rated wraparound protection that seals against your face. Most eye injuries happen from chips entering from the sides or top of regular glasses.
The fix:
Create a dedicated “safety station” near your router with all required PPE hanging in one spot. No PPE = no routing. Period.
Rule #4: Unplug Before Bit Changes (Seriously, Every Time)
The rule: Physically unplug your router from power before changing bits or making any adjustments.
Why it matters:
Accidental trigger activation during bit changes can cause severe hand injuries. This is the #1 cause of router-related ER visits according to woodworking safety studies.
Real consequence:
A friend of mine was showing his son how to change router bits. He thought he’d turned off his wireless remote control, but hadn’t. When his hand was near the collet, the router suddenly started. He lost part of his index finger’s fingertip.
The fix:
Develop a ritual: unplug → wait 10 seconds → change bit → double-check tightness → plug in. Make this automatic through repetition.
Rule #5: Feed Direction Matters (Against the Rotation)
The rule: Always feed your workpiece against the rotation of the bit—never with it.
Why it matters:
Feeding against rotation creates controlled cutting forces that pull the workpiece into the fence. Feeding with rotation (climb cutting) can cause the bit to grab and accelerate the workpiece uncontrollably.
The exception that proves the rule:
Professional woodworkers sometimes use climb cutting for final finish passes, but this requires specialized jigs, featherboards, and extensive experience. Beginners should avoid this technique completely until they’ve mastered standard feed direction.
The fix:
Mark your router base with arrows showing proper feed direction. For handheld routing: left to right when looking down at the work. For router tables: right to left when facing the fence.
Rule #6: Bit Installation Integrity (The 1/16″ Gap Rule)
The rule: When installing bits, insert fully then pull back 1/16″ before tightening the collet.
Why it matters:
Bits that bottom out in the collet don’t get proper clamping force along their full shank, leading to slippage during operation. This can cause inconsistent cuts or catastrophic bit failure.
Real consequence:
I once had a 1/2″ straight bit slip during a mortising operation. It shifted position mid-cut, ruining a $120 cherry board and nearly causing kickback that would have injured me.
The fix:
After inserting your bit, use a ruler to measure that 1/16″ gap before tightening. For critical work, mark your commonly used bits at the proper insertion depth with a permanent marker.r a complete walkthrough of router setup from unboxing to first cut, check out my detailed guide to router setup for beginners .
Rule #7: No Freehand Routing (Ever)
The rule: Always use a guide, fence, template, or jig—never route freehand.
Why it matters:
Freehand routing removes the critical stability that guides provide. Without reference points, it’s nearly impossible to maintain consistent pressure and direction, dramatically increasing the risk of accidents.
The professional exception:
Experienced woodworkers occasionally do freehand decorative work, but they use specialized techniques like starting with the bit above the workpiece and slowly lowering it into contact. Even then, they use push blocks and extreme caution.
The fix:
Invest in a quality edge guide for your router ($25-40). For router tables, ensure your fence is properly aligned and secured. For complex shapes, make simple templates from 1/4″ MDF.
⭐ “After my first router accident (a nasty gash on my forearm), I was ready to sell the thing and stick to hand tools. Daniel’s safety-first approach gave me the confidence to try again. I implemented all seven rules religiously, and now I actually look forward to routing sessions. My projects have improved dramatically because I’m not fighting fear every time I turn on the tool.”
— Jason from Denver
⭐ “As a high school shop teacher, I was constantly worried about students getting hurt on routers. We implemented Daniel’s seven safety rules as mandatory protocol, and in three years we haven’t had a single router-related injury. The two-hand grip rule and mandatory unplugging before bit changes were game-changers for our program. These rules work for everyone from teenagers to seasoned woodworkers.”— Marissa from Chicago
Common Router Safety Mistakes (And How to Avoid Them)
Even with good intentions, many woodworkers fall into these dangerous patterns. I’ve made nearly all of them myself—and seen students repeat them countless times.
Mistake #1: “I’ll Just Do This One Quick Cut Without Safety Gear”
Why it’s wrong: Most accidents happen during “quick” operations when safety protocols are relaxed.
The fix: Create a physical barrier to operation without PPE—store your router trigger lock in your safety glasses case, for example.
Mistake #2: Standing Directly Behind the Workpiece
Why it’s wrong: This puts you in the direct line of fire if the workpiece becomes a projectile.
The fix: Position yourself to the side of the cutting path, never directly behind the workpiece or in line with bit rotation.
Mistake #3: Using Dull Bits to “Be Safe”
Why it’s wrong: Dull bits require more force, generate more heat, and are actually more likely to cause kickback than sharp ones.
The fix: Develop a bit maintenance schedule—clean after each use and sharpen or replace when cuts require noticeably more pressure.
Mistake #4: Ignoring Body Positioning
Why it’s wrong: Poor stance creates physical instability that compromises control during routing.
The fix: Practice the “athletic stance”—feet shoulder-width apart, knees slightly bent, back straight—before every routing session.
This is just one piece of the bigger picture—my complete guide to woodworking shop safety covers emergency planning, fire prevention, and chemical storage that every woodworker needs to know.
Advanced Safety Techniques That Separate Good Woodworkers from Great Ones
Once you’ve mastered the seven non-negotiable rules, these professional techniques will elevate your safety game even further.
The Pre-Cut Safety Scan (30 Seconds That Save Lives)
Before every routing operation, systematically check:
- Workspace clearance – No obstacles within 3 feet of your cutting path
- Cord management – Power cord positioned away from cutting area, no tension
- Bit security – Give the installed bit a firm tug to verify tightness
- Guide/fence stability – Ensure all guides are securely attached and won’t shift
- PPE verification – Glasses sealed, hearing protection on, dust mask secure
This ritual takes 30 seconds but creates a safety mindset that carries through your entire session.
The Featherboard Force Multiplier
Featherboards aren’t just for accuracy—they’re critical safety devices that maintain consistent pressure and prevent workpiece movement.
Pro setup:
- Position featherboards to apply pressure toward the fence and down onto the table
- Use multiple featherboards for longer cuts to prevent mid-cut shifts
- Place the last featherboard just before the bit to maintain control during the most dangerous part of the cut
I consider featherboards as essential as safety glasses for router work. They cost $8-15 each but provide priceless peace of mind.
Dust Collection: The Hidden Safety Essential
Proper dust extraction isn’t just about cleanliness—it’s a critical safety component. Sawdust clouds obscure your view of the cutting action and can cause slips or misjudgments.
Minimum setup:
- Router-mounted vacuum attachment ($15-25)
- Table-mounted dust port for router tables
- Air filtration system for prolonged sessions
Clear visibility during routing is non-negotiable for safety. If you can’t see your cut line clearly, stop and address the dust issue first.
Router Safety by Project Type
Different routing operations present unique safety challenges. Here’s how to stay safe in common scenarios:
Edge Profiling Safety
- Primary risk: Workpiece lifting off table during routing
- Safety solution: Use featherboards at both the infeed and outfeed sides, plus a hold-down clamp for longer pieces
- Pro tip: For narrow stock (under 3″), always use a backing board to increase the surface area being routed
Template Routing Safety
- Primary risk: Template shifting during operation
- Safety solution: Secure templates with at least four clamps and verify stability before routing
- Pro tip: Add registration pins to your templates to prevent any lateral movement during routing
Plunge Routing Safety
- Primary risk: Loss of control during plunge entry
- Safety solution: Practice plunge technique on scrap wood first, start with the router running before contacting the wood
- Pro tip: Make multiple shallow plunges rather than one deep cut to maintain control and reduce strain on the motor
Dado and Groove Routing Safety
- Primary risk: Workpiece movement during straight cuts
- Safety solution: Use an edge guide with micro-adjustments and secure the workpiece with clamps on both sides
- Pro tip: For long dados, create stop blocks at both ends to prevent the router from running off the workpiece
Frequently Asked Questions About Router Safety
Q: Can I use my router without a dust collector if I'm just doing a quick job?
How do I know if my router bit is installed correctly?
Is it safe to use a router on small pieces under 6 inches long?
What's the minimum PPE required for router work?
Building Your Router Safety System
Perfect router safety isn’t about having the most expensive gear—it’s about creating a consistent system that becomes automatic through practice.
Your 5-Minute Pre-Session Routine
- Workspace preparation (60 seconds): Clear debris, verify lighting, position your vacuum
- Equipment check (60 seconds): Inspect router, verify bit security, check guides
- PPE setup (60 seconds): Put on glasses, hearing protection, dust mask in order
- Test run (60 seconds): Run router without workpiece to verify smooth operation
- Mental preparation (60 seconds): Visualize your cuts, identify potential hazards, plan emergency response
This routine takes exactly five minutes but creates a safety mindset that carries through your entire session. I’ve taught this to hundreds of students, and those who stick to it never have accidents.Once you have safety mastered, you’ll be ready to explore the creative possibilities—my guide to router techniques for beginners shows you exactly how to create beautiful joints and profiles with confidence.
The Buddy System for Critical Operations
For complex or high-risk routing operations, implement a simple buddy system:
- Have someone else in the shop during the cut (not necessarily helping, just present)
- Verbally confirm your safety setup before starting (“PPE on, workpiece secured, clear to cut”)
- Designate an emergency stop procedure (“If I yell STOP, hit the main power switch”)
This isn’t about supervision—it’s about accountability and having help immediately available if something goes wrong.
Ready to Build With Confidence?
Router safety isn’t just about avoiding injuries—it’s about building the confidence that lets you focus on craftsmanship instead of fear. When you know you’ve covered all the safety bases, you can channel your energy into creating beautiful, precise work instead of worrying about what might go wrong.
I used to dread routing sessions because of that one scary accident. Now, with these seven non-negotiable rules as my foundation, I actually look forward to turning on my router. The difference isn’t better equipment—it’s better safety habits.
Remember that workpiece that launched across my shop? Last month, I built a beautiful maple coffee table using the same router and techniques—but with proper safety protocols in place. The project took me three weekends, and every single cut was made with confidence and control.
That’s the power of proper router safety.
The foundation of great router work starts with perfectly prepared lumber. The same safety mindset that protects you at your router should protect you at your table saw.
I’ve created a FREE printable “Dead-Square Every Time” Table Saw Tune-Up Checklist that walks you through every critical safety and precision step in just 15 minutes.
Download it now, print it, and tape it to your saw. It’s the same checklist I use before every major project—because safety and precision go hand in hand.
Download it today, and by this weekend, you’ll have the foundation every serious builder needs to work safely and precisely.
Because you didn’t get into woodworking to fight your tools or fear your workshop. You got into it to build something beautiful—with confidence and control.
Let’s make sure your tools help—not hinder—that mission.