Stop Table Saw Blade Burning: The 5-Minute Fix That Saves Wood & Sanity
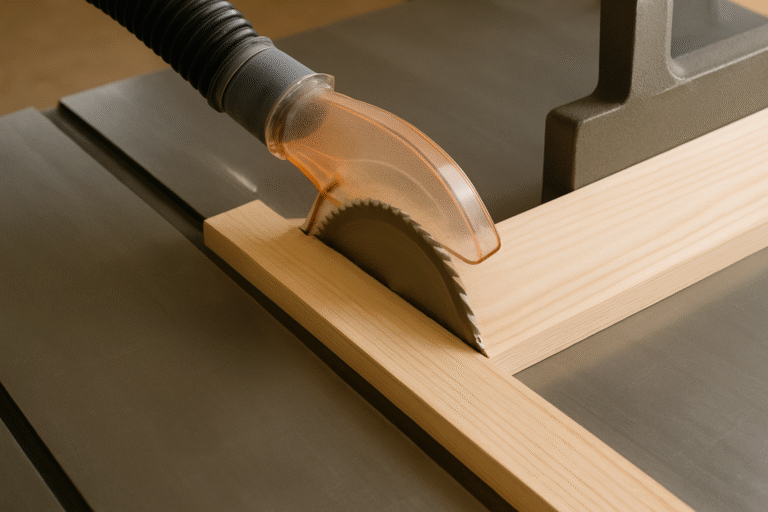
![Correct feed technique to prevent table saw blade burning—steady, consistent pressure with proper dust extraction.]](https://www.hmzwoodz.us/wp-content/uploads/2025/11/ChatGPT-Image-Nov-2-2025-08_39_07-PM-768x768.png)
You spend 30 minutes carefully measuring, marking, and setting up the perfect cut. You double-check your fence, square your miter gauge, and even wipe down the table just to be sure. You hit the power button… and that smell hits you before the blade even finishes the pass.
Burnt wood.
Again.
I’ve been there—more times than I care to admit. Early in my woodworking journey, I ruined a $40 walnut board because of table saw blade burning. Not because I measured wrong. Not because I rushed. But because I didn’t know this one simple truth:
Blade burning isn’t about your skill—it’s about your setup.
And the good news? In most cases, it can be fixed in under five minutes with tools you already own.
If you’re tired of wasting expensive lumber, smelling smoke every time you make a rip cut, or wondering why your “perfect” cuts look like they came out of a campfire—this guide is for you.
Let’s stop the table saw blade burning for good.
Why Your Table Saw Is Burning Wood (It’s Not Just a Dull Blade)
Most beginners assume table saw blade burning = dull blade. And sure, a dull blade can cause burning—but it’s rarely the main culprit.
Here’s what’s actually happening:
1. Your Feed Rate Is Too Slow
When you push wood through the blade too slowly, friction builds up. That heat chars the wood fibers, leaving behind ugly black marks. It’s not that the blade is “struggling”—it’s that you’re giving it too much time to cook your workpiece.
2. Your Fence Isn’t Parallel to the Blade
Even a slight misalignment—just 0.005 inches—can cause the back of the blade to rub against the freshly cut edge as the board exits. That rubbing = heat = burn marks. This is especially common on long rip cuts.
3. Your Blade Angle Is Off
If your blade isn’t perfectly perpendicular to the table (or slightly tilted forward), the trailing edge of the teeth drags instead of slicing cleanly. Again—drag equals friction, and friction equals burn.
4. Dust Buildup or Poor Dust Collection
Sawdust trapped between the blade and the kerf acts like sandpaper. It increases resistance, slows your feed, and creates hot spots. A clean cut path matters more than you think.
The worst part? These issues compound each other. A slightly misaligned fence + slow feed + dusty blade = guaranteed burn city.
But here’s the kicker: 95% of table saw blade burning disappears once you run through a quick 5-minute setup routine. No new tools. No expensive upgrades. Just smart, intentional adjustments.
Let me show you exactly how.
The 5-Minute Fix for Table Saw Blade Burning (Step by Step)
Grab a scrap board, your combination square, and a clean rag. We’re doing this now.
🔧 Adjustment #1: Check Your Blade Angle (30 Seconds)
Unplug your saw first—safety always comes before speed.
Raise your blade to full height. Place a reliable combination square against the blade body (not the teeth—more on that in a sec). Look for gaps along the entire height.
What to look for:
- If there’s daylight at the top or bottom, your blade isn’t 90°.
- Even a hairline gap means the trailing edge is dragging.
Quick fix:
Loosen your tilt adjustment lock and fine-tune using your saw’s 90° stop. Most saws have an adjustment screw near the trunnion—turn it until the blade sits dead-square. Recheck with your square.
💡 Daniel’s Mistake: Early on, I used the teeth to check angle. Big error. Blade teeth have “set”—they bend slightly left and right to clear the kerf. Always measure against the flat body of the blade.
🚶 Adjustment #2: Verify Your Feed Speed (1 Minute)
This isn’t about muscle—it’s about rhythm.
Stand at your saw and practice pushing a scrap board through without turning it on. Your motion should be smooth, consistent, and confident—not timid or jerky.
Now fire it up. Make a test rip on a 6″-wide pine board. Focus on maintaining steady pressure from start to finish. Don’t let the board linger near the blade.
Ideal feed rate feels like this:
- The motor hums steadily (no bogging down)
- Chips are uniform and light-colored (not powdery or dark)
- The board exits without hesitation
If you’re unsure, err on the side of faster. Burning almost always means you’re going too slow—not too fast.
✂️ Adjustment #3: Test With Scrap Wood (2 Minutes)
Don’t skip this. Ever.
Cut three identical test pieces:
- One at your normal pace
- One slightly faster
- One slightly slower
Compare the edges. The fastest clean cut wins. If all three burn, your issue isn’t feed rate—it’s alignment or blade condition.
📌 Pro Tip: Use softwood like pine for testing. It burns more easily than hardwood, so it reveals problems faster.
🔩 Adjustment #4: Make Micro-Adjustments to Fence Alignment (1.5 Minutes)
This is where most woodworkers lose the battle.
Your fence must be perfectly parallel to the blade—and just a hair wider at the back (0.002″ max) to prevent binding.
Here’s the field-expedient method (no dial indicator needed):
- Mark one tooth on your blade with a Sharpie.
- Position the tooth at the front of the table.
- Measure from that tooth to your fence (use a ruler or caliper).
- Rotate the blade so the same tooth is at the back.
- Measure again.
If the back measurement is smaller, your fence is pinching the board as it exits → burn city.
Fix it: Loosen the rear fence clamp and nudge the fence outward by the thickness of a business card. Retest.
Most contractor and hybrid saws allow this via rear adjustment bolts. Cabinet saws often use shims or eccentric cams—check your manual.
Do this once, and you’ll wonder why you ever accepted burnt edges as “normal.”
Your Blade Burning Prevention System (Keep It From Coming Back)
Fixing the problem is step one. Preventing it is step two.
✅ Maintenance Checklist (Do This Monthly)
- Clean pitch buildup from your blade with citrus-based cleaner
- Wax your table surface for smoother feeding
- Re-check fence alignment after moving your saw
- Inspect your riving knife for burrs or misalignment
🔪 Blade Sharpening Guide
A sharp blade cuts with less force, which means less heat. But don’t sharpen too often—each sharpening removes carbide.
Sharpen when:
- You see burn marks even with perfect feed
- Chips turn powdery instead of curly
- You need to apply noticeable pressure
For most hobbyists, that’s every 8–12 hours of cutting time.
💨 Dust Collection Matters More Than You Think
Hook up your shop vacuum or dust collector every time you cut. A clear kerf reduces friction, keeps your blade cool, and gives you cleaner cuts.
Even a $30 separator bucket helps. Just get the dust out of the way.
And if you’ve ever wondered why your cuts still feel “off” even after tuning, it might be one of the common woodworking mistakes beginners make —like ignoring dust buildup or skipping seasonal alignment checks.
Still Burning? 3 Advanced Fixes to Try
If you’ve done all the above and you’re still seeing burn marks, try these:
1. Switch to a Rip-Cut Blade
Combination blades try to do everything—and excel at nothing. For ripping, use a dedicated rip blade (24–30 teeth). Fewer teeth = bigger gullets = better chip ejection = less heat.
If you’re not sure which jigs help maintain consistent pressure during these cuts, check out my guide to the essential table saw jigs for beginners —a featherboard or hold-down jig can make a huge difference in preventing burn through better control.
2. Check for Blade Warp or Runout
Spin your blade by hand. Does it wobble? Hold a pencil near the edge—if the gap changes, your arbor or blade is bent. Replace or repair.
3. Use a Featherboard
A featherboard holds your workpiece firmly against the fence, eliminating side-to-side movement that causes inconsistent feed and localized burning.
For even greater precision on crosscuts—where burn can also sneak in—consider building a DIY crosscut sled . It eliminates fence-related variables and gives you repeatable, burn-free results every time.
Ready for Dead-Square, Burn-Free Cuts Every Time?
Look—I used to accept table saw blade burning as “just part of woodworking.” Then I realized: precision starts before the cut.
Once I dialed in my table saw with a simple, repeatable routine, everything changed. My joints closed tighter. My projects looked professional. And I stopped dreading that awful burnt smell.
You deserve that confidence too.
That’s why I created the FREE “Dead-Square Every Time” Table Saw Tune-Up Checklist—a printable, step-by-step guide that walks you through every critical adjustment, including blade alignment, fence calibration, and seasonal maintenance.
It’s the exact system I use in my shop, refined over 15 years and hundreds of projects.
Download it, tape it to your shop wall, and run through it this weekend. In 15 minutes, you’ll eliminate 90% of the frustrations holding your work back.
Because you didn’t get into woodworking to fight your tools. You got into it to build something beautiful.
Let’s make sure your table saw helps—not hinders—that mission.