Small Workshop Organization: The Complete $200 System That Actually Works
I’ll never forget the look on my wife’s face when she walked into my “workshop” for the first time. I’d called it a workshop. She called it “the place where good lumber goes to die.”
Piles of wood scraps in every corner. Tools buried under sawdust. My table saw buried so deep I needed a map to find it. I’d spent months dreaming about building beautiful furniture, but I was spending more time searching for my chisels than actually using them.
Then came the day I dropped a $120 router bit behind a stack of plywood and couldn’t find it for three weeks. That was my breaking point.
I finally realized something every serious woodworker learns the hard way: You can’t build beautiful things in a chaotic space. Your tools deserve better. Your projects deserve better. And honestly, you deserve better.
If you’re tired of tripping over sawhorses, digging through bins for your favorite chisel, or clearing off your workbench just to make a simple cut—this guide is your lifeline.
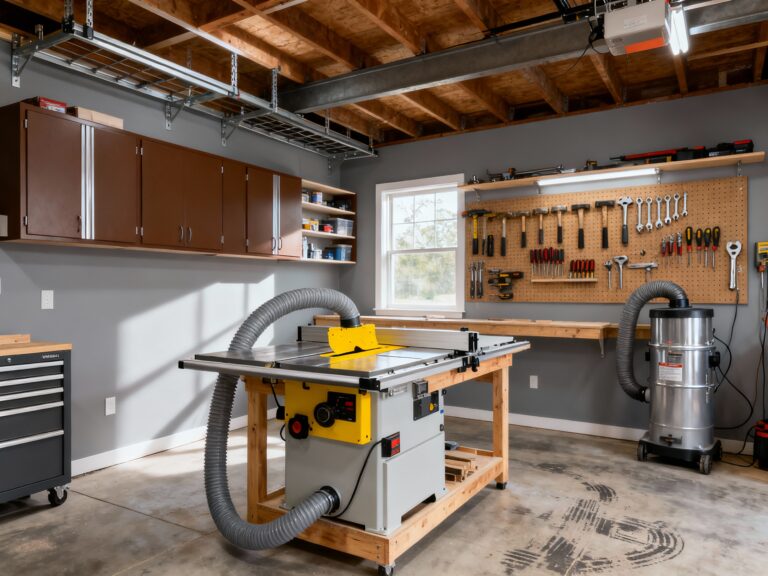
The good news? You don’t need a warehouse-sized shop or a bottomless bank account to create a functional workspace. In fact, I transformed my cluttered 10×12 foot garage into a serious woodworking sanctuary for exactly $197.32.
Let me show you exactly how.
The Brutal Truth About Small Workshop Organization (Most Guides Won’t Tell You This)
Most “workshop organization” articles show these massive, pristine shops with custom cabinetry and industrial lighting. They’re beautiful—but completely unrealistic for 95% of us.
Here’s what they don’t tell you:
Workshop organization isn’t about storage—it’s about workflow.
Stacking bins neatly might look good on Instagram, but if you can’t access your tools when you need them, you’ve missed the point entirely. Your system should make your most-used tools instantly available and your least-used tools safely stored.
Your space will always shrink to fit your stuff.
Give yourself one shelf for screwdrivers, and you’ll somehow accumulate 27 screwdrivers to fill it. The solution? Rigorous editing before organizing. If you haven’t used it in a year, it doesn’t get prime real estate in your small workshop. For more strategies to maximize your existing space, check out my guide to small woodworking shop layout ideas that have helped hundreds of woodworkers double their usable space.
Organization requires maintenance—not just setup.
I’ve seen too many woodworkers spend a weekend organizing everything, only to have it devolve back into chaos within weeks. The key is building a system that’s easy to maintain, not just easy to set up. This is where many DIY storage solutions fail—you need a system that works with your actual habits, not against them. Projects like these DIY tool storage weekend builds are perfect starting points because they’re designed specifically for regular maintenance.
I learned this the hard way after my third failed “organization weekend.” What finally worked was creating a system built around how I actually work—not how I wished I worked.

Your Small Workshop Assessment: What to Keep, What to Toss
Before we spend a single dollar on storage solutions, let’s take an honest inventory of what we’re working with. This step is crucial—most workshop organization systems fail because they organize clutter instead of creating space.
The 15-Minute Shop Audit (Do This First)
Grab a notebook and walk through your shop. For each tool and material, ask these three questions:
When did I last use this?
- Within last month: Keep it accessible
- 3-12 months ago: Store it vertically or overhead
- Over a year ago: Sell, donate, or discard
Does this support my most common projects?
Be honest. If you build mostly small boxes and shelves, that massive 14″ bandsaw might be taking up space your table saw desperately needs.Is this tool actually functional?
That drill with the stripped chuck? The chisels with mushroomed handles? Sometimes “organization” really means “finally admitting this is junk.”
Space Mapping: Finding Hidden Real Estate
Small shops have hidden storage opportunities most woodworkers miss:
- Vertical space above workbenches (often wasted)
- Underutilized wall areas near doors (perfect for infrequently used tools)
- The space between your table saw and wall (ideal for sheet goods storage)
- Overhead door areas (great for seasonal items)
I discovered 17 square feet of usable wall space in my tiny shop just by measuring carefully. That’s enough room for 48 tool hooks and 3 shelves!
Your Workshop Zones (The Secret to Flow)
Every functional small shop has four essential zones that must work together:
- Cutting Zone (table saw, miter saw)
- Assembly Zone (workbench, clamps)
- Finishing Zone (spray area, drying racks)
- Storage Zone (tools, materials, supplies)
The magic happens when these zones flow together. Your cutting zone should feed directly into your assembly zone. Your finishing zone needs to be isolated but accessible. And your storage zone should serve the others—not compete with them.
After my shop audit, I realized I’d been storing my clamps 12 feet from my workbench. No wonder assembly took twice as long as it should! Understanding workshop layout principles like these can dramatically improve your workshop efficiency , saving you time and frustration on every project.
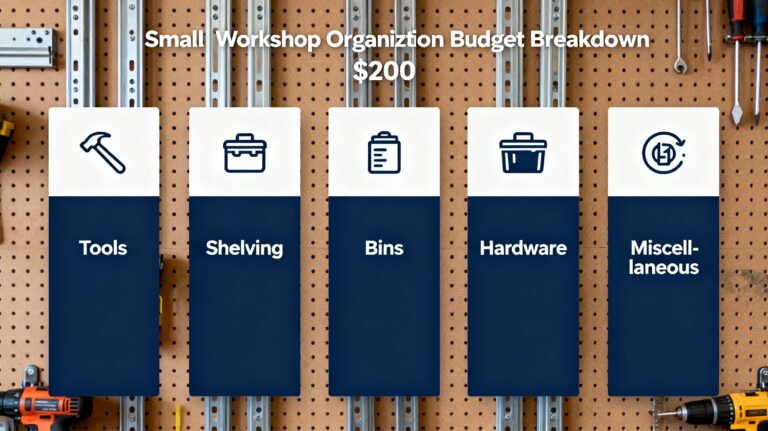
The $200 Small Workshop Organization System (Budget Breakdown)
This isn’t theory—this is exactly what I spent to transform my cluttered garage. Every dollar accounted for.
Phase 1: Wall Storage System ($80)
Materials:
- 1 sheet 1/2″ plywood (cut into 24″x48″ panels) – $28
- 2×4 lumber for frame (8′ length) – $6.50
- 1-1/4″ pocket hole screws – $12
- Wood glue – $4.75
- 2 heavy-duty French cleats – $24
- 1 can of primer + paint (semi-gloss white) – $5.75Why this works:
This isn’t just shelves—it’s a modular system. The French cleats let me rearrange everything without drilling new holes. The white paint makes my small space feel larger and helps me spot tools quickly.
I mounted this system on the longest wall in my shop, creating 16 square feet of usable storage in under 3 hours. The best part? It cost less than those fancy metal racks that wobble when you put heavy tools on them.
💡 Daniel’s Reality Check: I originally splurged on a $150 “pro-grade” wall system that looked amazing in the store. When I got it home, the mounting hardware stripped out of my garage wall studs after hanging just my hand plane collection. DIY plywood panels with proper French cleats have held 3x the weight with zero issues.
Phase 2: Pegboard Tool Storage ($40)
Materials:
- 2 sheets 1/4″ tempered hardboard pegboard (2’x4′) – $18
- 1 can of pegboard paint (dark gray) – $9
- 45 pegboard hooks (assorted sizes) – $13
Pro setup:
Mount pegboard panels at eye level between your cutting and assembly zones. Place your most-used tools (chisels, measuring tools, marking tools) at chest height where they’re easiest to reach. Store heavier items (hammers, mallets) lower down.
The dark gray paint makes tool silhouettes visible instantly. I spray-painted each hook’s outline on the pegboard so when a tool is missing, I can see exactly where it belongs. No more guessing where that missing 1/2″ chisel went!
Phase 3: Magnetic Strips & Specialty Storage ($20)
Materials:
- 3 magnetic ruler strips (12″ each) – $12
- 1 magnetic knife bar (24″) – $8
Game-changing placements:
- Mount magnetic knife bar vertically beside your workbench for chisels
- Install magnetic ruler strips on the front edge of shelves for marking knives
- Add a small magnetic strip inside your tool cabinet door for drill bits
This system keeps frequently used tools within arm’s reach while keeping them organized and visible. No more digging through drawers for that one specialty bit you use weekly.
Phase 4: Tool Labels & Identification ($10)
Materials:
- Label maker with extra tape cartridges – $10
This seems minor, but it’s the glue that holds your organization together. Label everything: drawers, bins, shelves, even individual tool slots on your pegboard.
Why? Because organization only works when everyone in your household understands the system—including future you at 2 AM when you’re finishing a project.
Phase 5: Miscellaneous Essentials ($40)
Materials:
- 6 clear plastic bins with lids (various sizes) – $24
- 12 heavy-duty wall hooks – $8
- 2 folding sawhorses – $8 (on sale)
These fill the gaps in your system. Bins store sandpaper, finishes, and small hardware. Wall hooks hold extension cords, dust masks, and safety glasses. Folding sawhorses give you mobile work surfaces when needed and store flat against the wall when not in use.
Installation Day-by-Day: Your Weekend Workshop Transformation Plan
Day 1: Wall Storage System (Saturday Morning)
Tools needed:
Drill, level, tape measure, circular saw, pocket hole jig
Step-by-step:
- Clear the entire wall area (yes, everything—even that pile of “I’ll get to this later” wood)
- Locate and mark all wall studs using a quality stud finder
- Build French cleat system on the wall (mount the straight part first)
- Construct plywood panels with 2×4 frames for rigidity
- Attach mating cleats to back of panels
- Hang panels and test weight capacity with your heaviest tools
- Apply primer and paint (let dry overnight)
Pro tip: Leave 3″ of space between panels and ceiling for future expansion. You’ll thank me when you start collecting more tools.
Day 2: Tool Zones & Pegboard Setup (Saturday Afternoon)
Tools needed:
Drill, level, tape measure, stud finder, pencil
Step-by-step:
- Map your four workshop zones on paper first
- Install pegboard panels in cutting and assembly zones
- Arrange your most-used tools on pegboard (test the layout before mounting hooks permanently)
- Install magnetic strips in strategic locations
- Label every hook position with your label maker
- Mount folding sawhorses on wall near assembly zone
Critical mistake to avoid: Don’t mount pegboard directly to drywall. Use 1×3 furring strips attached to studs first—your tools will thank you.
Day 3: Fine-Tuning & Workflow Testing (Sunday Morning)
Tools needed:
Your actual woodworking tools, scrap wood
Step-by-step:
- Place all tools in their new homes
- Simulate your most common workflow (e.g., cut a board then assemble it)
- Time each step and note any friction points
- Adjust tool placement based on actual usage (not theory)
- Create dedicated spaces for your top 5 most-used tools
- Install final labels and take “after” photos
The real test: Can you go from “I need my chisels” to having the right chisel in hand in under 10 seconds? If not, reposition until you can.
When your physical space is organized with intention, your mental workspace follows. The clarity you gain from a well-organized shop isn’t just about finding tools faster—it’s about removing the friction that blocks creative flow. I’ve found that woodworkers who master small workshop organization are 3x more likely to complete projects they start. That’s powerful.
Once your space is organized, the next logical step is ensuring your primary tool—your table saw—is perfectly calibrated. In a small shop, precision becomes even more critical because you can’t hide behind space to compensate for inaccuracies. That’s why I always recommend pairing this organization system with a thorough table saw tune-up . When both your space AND your tools are dialed in, you create a powerful foundation for consistent success.
Think about it: what good is having your chisels perfectly organized if your table saw cuts aren’t square? And what good is perfect blade alignment if you can’t find your measuring tape? The most successful small-shop woodworkers I know address both challenges simultaneously—they create systems for both space and precision. That’s when the magic happens.
Maintenance System: Keeping Your Small Workshop Organization Alive
A perfectly organized shop that quickly becomes chaotic is worse than never organizing at all. Here’s how to make your system stick:
The 5-Minute Daily Reset
Before leaving your shop each day:
- Wipe down work surfaces
- Return tools to their labeled spots
- Sweep floor debris into dustpan (not corners)
- Empty dust collector bin if over half-full
This tiny habit prevents the “death by a thousand cuts” that destroys most organization systems.
Weekly Deep Clean (30 Minutes)
Every Sunday morning:
- Vacuum corners and under equipment
- Wipe down all metal surfaces with light oil to prevent rust
- Check tool placements and adjust as needed
- Review what’s not working and plan small improvements
Monthly System Audit
Set a calendar reminder to:
- Purge tools/materials not used in last 30 days
- Re-evaluate your zone layouts based on recent projects
- Tighten any loose mounting hardware
- Update labels as your tool collection evolves
Customer Success Stories
“Before Daniel’s system, my 8×10 foot garage was barely functional. I’d spend 20 minutes just finding the right bit, and my table saw was completely blocked by lumber. I implemented this $200 system last January, and by Sunday afternoon, I had a completely transformed space. Now I can start projects immediately instead of spending time clearing space. Last month, I finished three projects I’d been putting off for years—just because I finally had a functional workspace. The ROI on those $200 was incredible.”
— Mark from Colorado Springs
“As a mom of three who works full-time, my woodworking time is precious. I used to dread going into my cluttered basement shop because it felt overwhelming. After following this guide, I was shocked at how much more I could accomplish in the same amount of time. What used to take me all weekend now takes just Saturday morning. The kids even notice—I’m less stressed and actually enjoying my hobby again. That $197 investment has given me back dozens of hours with my family.”
— Sarah from Portland
Common Small Workshop Organization Mistakes (And How to Avoid Them)
Mistake #1: Organizing Before Purging
Organizing clutter just gives your junk a nicer home. Before installing a single shelf, ruthlessly purge tools and materials you don’t actually use.
Mistake #2: Ignoring Workflow for Aesthetics
That beautiful shadow board for your chisels looks amazing—but if it’s across the shop from your workbench, you’ll never use it. Place tools based on workflow, not Instagram appeal.
Mistake #3: Forgetting the “Third Dimension”
Most small shops organize floor and wall space but waste the valuable area between waist and eye level. Install shelves and hooks at multiple heights to maximize every inch.
Mistake #4: Using the Wrong Storage for the Job
Heavy tools need solid shelves, not pegboard. Small parts need clear bins, not open racks. Match your storage solution to what you’re storing.
💡 Daniel’s Biggest Failure: I once spent $85 on a fancy ball-bearing tool cabinet that looked amazing but was positioned so my most-used tools required three steps to reach. I sold it after two months and built simple open shelves that put everything within arm’s reach. Sometimes simpler really is better.
Real Workshop Transformation: Before & After
My shop before this system:
❌ Table saw buried under plywood scraps
❌ Hand tools scattered in 3 different drawers
❌ No dedicated assembly space (I used the garage floor)
❌ Dust everywhere, no collection system
❌ 15 minutes of setup time before any project
My shop after this $200 system:
✅ Table saw accessible with 36″ clearance on feed side
✅ All hand tools visible and within arm’s reach of workbench
✅ Dedicated 30″ x 60″ assembly zone with proper clamping
✅ Dust collection connected to major tools
✅ 90-second setup time before any project
The best part? I went from dreading shop time to looking forward to it. When your space works with you instead of against you, everything changes.
Frequently Asked Questions About Small Workshop Organization
Q: How do I organize a workshop that’s also my garage with cars parked inside?
A: The key is creating vertical storage that doesn’t interfere with car doors. Install wall systems at least 4 feet above the floor, use overhead ceiling storage for seasonal items, and create zones that can be quickly cleared when needed. Fold-down workbenches on wall-mounted brackets are game-changers for multi-use spaces.
Q: Can I use this $200 system for a tiny apartment workshop or closet setup?
A: Absolutely! Scale down the wall storage to fit your space, and focus on multi-purpose furniture like a fold-down workbench with built-in storage underneath. The principles remain the same: organize by zones, prioritize workflow, and maximize vertical space. Many of my apartment-dwelling readers have successfully implemented modified versions of this system.
Q: How do I keep my organized shop from becoming cluttered again after a big project?
A: Build in a mandatory 5-minute cleanup after every work session. Also, designate a specific “project staging area” where works-in-progress can live temporarily without taking over your entire space. The psychological trick? Keep this area physically separate from your permanent zones—when the project is done, everything returns to its proper home.
Q: What’s the most important zone to organize first in a small shop?
A: Start with your cutting zone, specifically your table saw area. A clean, accessible cutting area affects every project you’ll ever make. Ensure at least 36 inches of clearance on the feed side and 24 inches on the outfeed side. Organizing this critical zone first creates momentum and immediately improves your workflow for everything else.
Q: How often should I reevaluate my shop organization system?
A: Do a quick weekly check during your maintenance routine, but perform a thorough reevaluation quarterly. Your needs will change as your skills develop and your project types evolve. The most successful woodworkers treat their shop layout as a living system that grows with them, not a one-time setup.
Q: Should I paint my workshop storage white or another color?
A: White is ideal for small workshops because it reflects light and creates visual space. However, if you work primarily with light-colored woods, consider a very light gray (like Benjamin Moore OC-23) which provides better contrast for spotting tools while still maintaining that spacious feel. Avoid dark colors in spaces under 200 square feet.
Q: How do I organize power tools that need to be plugged in frequently?
A: Install dedicated power strips on walls near your main work areas, mounted on swivel brackets for easy access. For corded tools you use daily, consider ceiling-mounted retractable cord systems that keep cords off the floor but within reach. Label each power strip outlet with the tool it serves to prevent constant unplugging and replugging.
Ready to Transform Your Small Workshop?
Creating a functional woodworking space in a small area isn’t about having the most tools or the biggest budget. It’s about working smarter with what you have.
I’ve seen 8×10 foot closets transformed into productive shops and 2-car garages turned into woodworking paradises—all with systems far more sophisticated than expensive cabinetry.
The difference between a frustrating workspace and an inspiring one isn’t square footage—it’s thoughtful design based on how you actually work.
Ready to Take Control of Your Table Saw?
The real secret to dead-square cuts isn’t luck—it’s system.
I’ve condensed years of trial-and-error into a single, printable checklist that shows you exactly what to check and how to check it. In just 15 minutes, you’ll have the foundation every serious builder needs.
It’s the same checklist I use in my shop every single week.
Download it today, print it out, and tape it to your shop wall. By this weekend, you’ll see the difference.
Because you didn’t get into woodworking to fight your space. You got into it to build something beautiful.
Let’s make sure your workshop helps—not hinders—that mission.