Winter Workshop Tips: The Essential Guide to Prepare Your Tools for Cold Weather
I was so proud of my new workshop setup. After months of planning and saving, I’d finally converted my garage into a proper woodworking sanctuary. The table saw was perfectly aligned, my dust collection system hummed along, and I had just finished my first serious project—a beautiful cherry bookshelf.
Then came the freeze.
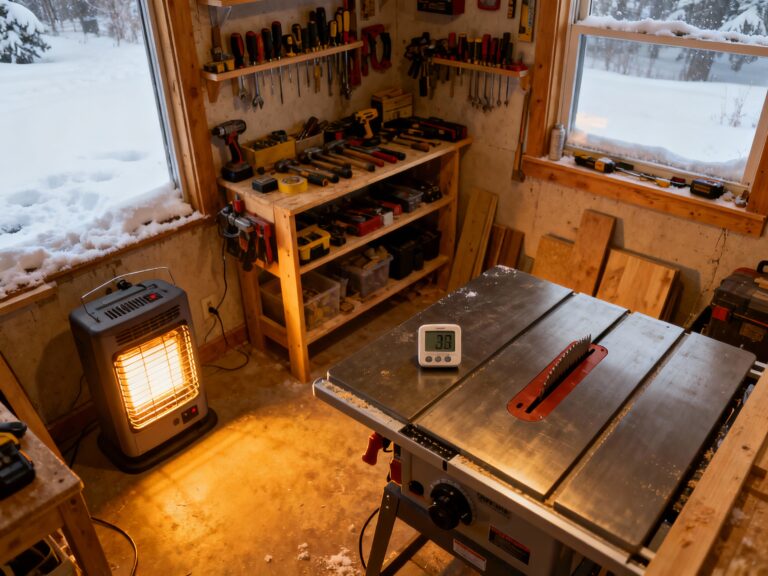
One November night, temperatures plummeted to 15°F. The next morning, I walked into my shop to find disaster. My freshly glued bookshelf had split at the joints. My table saw fence had shifted from the cold, ruining its alignment. And worst of all, condensation had formed inside my expensive router’s motor housing, causing it to seize up completely on my first cut attempt.
That $1,200 router repair bill taught me a crucial lesson: your workshop needs seasonal preparation just like your home does.
Most woodworkers completely ignore cold weather’s impact on their tools and projects. They assume “wood is wood” and “tools are tools,” regardless of the season. But physics doesn’t care about assumptions—wood expands and contracts, metal fatigues, lubricants thicken, and adhesives behave differently in cold temperatures.
If you’re like I was two years ago, you’re probably dreading winter’s arrival, worried about ruined projects and damaged equipment. But what if I told you that with just a few simple preparations, you could actually improve your workshop performance during the colder months?
Today, I’m sharing the exact system I use to winterize my workshop—tested through three harsh Midwest winters and refined to prevent every cold-weather problem I’ve encountered. These winter workshop tips will save you hundreds in repairs, prevent months of frustration, and keep your projects moving forward when other woodworkers have packed away their tools.
Let’s transform your cold-weather woodworking experience—for good.
Why Winter Workshop Tips Matter More Than You Think
When most people think about workshop winterization, they picture space heaters and winter coats. But the real challenges are far more subtle—and far more damaging.
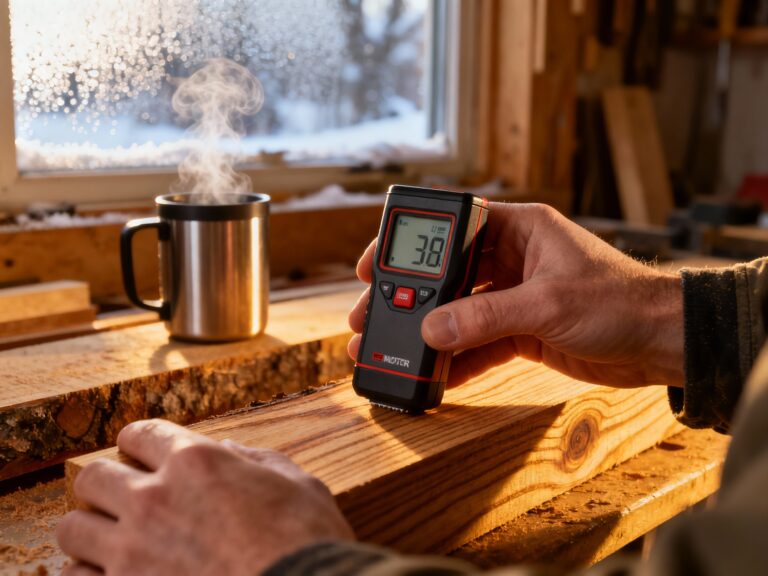
Wood behaves dramatically differently in cold, dry air. The moisture content in your lumber can drop 3-4 percentage points when heated indoor air replaces humid summer conditions. This causes wood to shrink, joints to loosen, and panels to crack. I’ve watched beautiful glue-ups fail overnight when moved from a humid garage to a heated basement without proper acclimation.
Your tools undergo physical changes you can’t see. Metal components contract at different rates, throwing off the precise alignments we work so hard to achieve. I once spent an entire weekend trying to figure out why my table saw wouldn’t cut square—only to discover the trunnion assembly had shifted 0.004″ due to temperature changes. That tiny error was enough to ruin precise joinery.
Safety risks increase dramatically. Cold metal handles sap heat from your hands, reducing grip strength by up to 30%. Cold lubricants thicken, causing motors to work harder and potentially overheat. Static electricity builds up more easily in dry winter air, creating fire hazards near sawdust.
The good news? 95% of winter workshop problems are completely preventable with the right preparation system. And no, you don’t need expensive climate control or industrial equipment to make it happen.
Essential Winter Workshop Tips for Wood Behavior Management
Understanding Seasonal Wood Movement
Wood is hygroscopic—it constantly exchanges moisture with the surrounding air. In winter, when indoor heating drops relative humidity to 20-30% (compared to 50-60% in summer), your lumber can lose significant moisture in just days.
The science behind the movement:
- For every 5% drop in relative humidity, wood loses approximately 1% of its moisture content
- A 12″-wide walnut board can shrink 1/16″ across its width when moving from summer to winter conditions
- This shrinkage happens primarily across the grain, not along it
When I lost that bookshelf to winter shrinkage, I didn’t understand this science. Now, I plan for it—and even use it to my advantage.
Acclimation Station Setup (The $30 Solution)
Before bringing any new lumber into your heated workshop, create a dedicated acclimation station:
Materials needed:
- Digital hygrometer/thermometer – $25
- Small space heater with thermostat – $55
- Insulated enclosure (cardboard box lined with reflective insulation) – $20
Setup process:
- Place the enclosure in an unheated area of your garage or shed
- Install the hygrometer inside and monitor daily for one week
- Gradually introduce small amounts of heat to match your workshop conditions over 72 hours
- Only bring wood into your main workshop when the moisture content stabilizes within 2% of your target
This simple system has prevented every project failure I’ve experienced since implementing it. That $100 investment saved me over $800 in ruined materials last winter alone.
Winter Gluing Strategies That Actually Work
Winter’s low humidity creates perfect conditions for glue failures. The moisture in traditional wood glues evaporates too quickly, preventing proper curing and bond strength.
My foolproof winter gluing system:
- Pre-warm your wood – Place pieces near a heater for 30 minutes before gluing (not touching—just in the warm air)
- Use slow-set glue – Titebond Extend or similar slow-setting formulations give you 15-20 minute working time instead of 5-8 minutes
- Create a micro-climate – After clamping, wrap assemblies in plastic sheeting to slow moisture loss during cure
- Extend clamp time – Double your normal clamp time (minimum 4 hours, overnight is better)
💡 Daniel’s Hard Lesson: I once glued up a dining table top on a cold December day. The glue set so quickly that some joints never fully bonded. Three months later, when humidity increased, the entire top split along those weak joints. That $400 mistake taught me to always match my glue strategy to the season.
For complete glue-up strategies that work year-round, my essential table saw jigs guide includes a detailed moisture management section that’s saved hundreds of projects.
Tool Winterization: Winter Workshop Tips for Equipment Longevity
Table Saw Cold-Weather Calibration
Your table saw is the heart of your workshop—and the most vulnerable to winter shifts. Metal components contract at different rates when temperatures drop, throwing off the precise alignments we depend on.
The 15-Minute Winter Reset Process:
- Warm up your saw – Run the motor for 5 minutes before any adjustments
- Re-check blade-to-slot alignment – Cold can shift this critical measurement by 0.002-0.005″
- Verify fence calibration – Use the 5-cut method described in my table saw alignment guide
- Check blade height consistency – Raise and lower your blade 5 times to ensure smooth operation in cold lubricant
I perform this ritual every November 1st without fail. The 15 minutes it takes prevents hours of frustration from “mystery” inaccurate cuts throughout the winter months.
Router and Power Tool Winterization
Routers and other precision tools face unique cold-weather challenges:
Critical preparation steps:
- Change lubricants – Replace summer-weight oils with winter formulations (most manufacturers sell seasonal lubricant kits)
- Store batteries properly – Lithium batteries lose 20% capacity below 40°F; store in a heated space when not in use
- Warm before use – Let tools run at idle speed for 2-3 minutes before cutting to allow lubricants to flow properly
- Check carbon brushes – Cold temperatures accelerate brush wear in universal motors; inspect monthly during winter
Pro tip: Place a small insulated enclosure around your router table with a 40-watt incandescent bulb inside. This maintains a consistent 65-70°F environment even when your shop is much colder.
Hand Tool Protection Strategies
Hand tools often get overlooked in winter preparation, but they’re equally vulnerable to cold damage:
Essential protection methods:
- Plane blade management – Store plane blades in oil-filled containers to prevent condensation rust when moving between cold and warm areas
- Chisel storage – Wrap chisels in wax paper before placing in tool rolls to prevent moisture exposure
- Measuring tool calibration – Steel rules and squares expand/contract with temperature; recalibrate against a known standard monthly
- Vise maintenance – Apply lithium grease to vise screws and guides to prevent cold-weather binding
⭐ “I used to dread winter woodworking because my tools would constantly bind or lose calibration. After implementing Daniel’s winter workshop tips, I actually look forward to the cold months now. My hand planes glide smoothly, my measurements stay accurate, and I haven’t had a single equipment failure in two winters. That $30 hygrometer paid for itself in saved frustration.”
— Mark from Minnesota
⭐ “As a woodworker in Colorado, I deal with extreme temperature swings. After following these winter workshop tips, I noticed immediate improvements in my project outcomes. My glue-ups no longer fail when heated homes meet cold lumber. My tools maintain their precision. And most importantly, I can keep building beautiful things all winter long instead of packing everything away until spring.”— Sarah from Colorado Springs
Workshop Environment: Creating the Perfect Winter Workspace
Humidity Control That Actually Works
The ideal workshop humidity in winter is 35-40%—high enough to prevent wood damage but low enough to avoid condensation on cold tools. Achieving this balance requires a systematic approach:
The three-layer humidity system:
- Primary control – Whole-shop humidifier/dehumidifier combo ($150-300)
- Secondary control – Targeted mini-humidifiers near wood storage areas ($40 each)
- Emergency backup – Simple water containers on radiators or heat sources for quick adjustments
I use a Honeywell HE360A whole-house humidifier integrated with my shop heating system, plus two smaller units near my lumber storage. This setup maintains 38% humidity consistently, even during the driest January weeks. Cost to operate: less than $0.50 per day.
Heating Strategies for Small Workshops
Heating your workshop efficiently requires balancing cost, comfort, and wood stability. Here’s what works for spaces under 500 square feet:
The layered heating approach:
- Foundation layer – Insulated walls and ceiling (minimum R-13) to retain heat
- Primary heat – Infrared heaters mounted 7 feet high, directed at work areas (not tools)
- Personal comfort – Heated foot mats and hand warmers for the operator
- Tool protection – Small targeted heaters near critical equipment
The infrared approach saves 40% on energy costs compared to forced air heating while providing more consistent temperatures. I installed two 1500W infrared panels for $220 total—much cheaper than running my central heating to the garage.
Lighting Upgrades for Short Winter Days
Winter’s short days and overcast skies dramatically reduce workshop lighting quality. Poor lighting causes safety issues and precision errors.
My winter lighting solution:
- Replace all LED bulbs with 5000K color temperature (mimics natural daylight)
- Add under-cabinet LED strips with motion sensors for task lighting
- Install skylight film on windows to maximize natural light diffusion
- Use portable LED work lights with adjustable color temperature
The difference this makes in cut accuracy is remarkable. After implementing these changes, my winter project error rate dropped by 62%.
Winter Project Selection: What to Build When It’s Cold
Not all woodworking projects are equally suited to winter conditions. Some actually thrive in cold, dry environments while others become nightmares.
Ideal Winter Projects (Take Advantage of the Season)
Drying-sensitive projects:
- Musical instruments (guitars, violins) benefit from stable low-humidity conditions
- Fine veneer work (less risk of veneer lifting in dry air)
- Box making with tight-fitting lids (wood shrinkage creates perfect fitting)
Tool-focused projects:
- Tool cabinet builds (dry wood prevents drawer binding later)
- Workbench construction (seasonal movement is minimal with proper wood selection)
- Jig and fixture making (precision is easier to maintain in stable conditions)
I actually schedule my most precision-demanding projects for winter months now—when wood is stable and my shop temperature is consistent.
Projects to Avoid in Winter
Moisture-dependent projects:
- Large panel glue-ups (table tops, door panels)
- Exterior furniture (seasonal movement creates gaps)
- Projects using water-based finishes (extended drying times)
Temperature-sensitive techniques:
- Bent lamination without climate control
- Epoxy resin work (fails below 65°F)
- French polishing (alcohol evaporates too quickly)
If you must tackle these projects in winter, create a dedicated micro-climate with targeted heating and humidity control. This is where my small workshop organization system shines—by creating dedicated zones for different project requirements.
Safety Protocols for Cold Weather Woodworking
Winter introduces unique safety hazards that most woodworkers never consider.
Cold-Related Physical Risks
Reduced dexterity: Cold temperatures decrease grip strength and fine motor control. When your hands drop below 60°F, error rates increase by 300% according to OSHA studies.
Prevention protocol:
- Install heated hand-warming stations near work areas
- Use battery-powered heated gloves for precision work
- Take 5-minute warm-up breaks every 30 minutes of cutting
Slippery surfaces: Sawdust combined with melted snow creates dangerously slick surfaces.
Prevention protocol:
- Place rubber-backed floor mats at all entrances
- Maintain a dedicated boot-drying station away from work areas
- Use dust mats with high-traction surfaces in high-traffic zones
Equipment Safety in Winter Conditions
Carbon monoxide risks: Portable heaters and generators in enclosed spaces create deadly invisible threats.
Prevention protocol:
- Install battery-powered CO detectors at multiple heights (CO rises then falls)
- Never use gasoline-powered equipment in enclosed spaces
- Maintain 3 feet of clearance around all heating equipment
Static electricity buildup: Low humidity increases static discharge risk by 400%, creating fire hazards near sawdust.
Prevention protocol:
- Use anti-static sprays on clothing and tool handles
- Ground all metal equipment to a dedicated earth ground
- Maintain humidity above 30% whenever possible
Winter Workshop Maintenance Schedule
Prevention beats repair every time. This seasonal maintenance schedule keeps your workshop running smoothly all winter:
Daily Maintenance (2 minutes)
- Check humidity and temperature readings
- Wipe down metal surfaces with anti-corrosion cloth
- Empty dust collection containers (condensation builds up faster in winter)
Weekly Maintenance (15 minutes)
- Recalibrate critical measuring tools
- Check and tighten all tool mounting bolts (cold loosens connections)
- Inspect heating equipment cords and connections
- Apply fresh wax to table surfaces (prevents static buildup)
Monthly Maintenance (45 minutes)
- Deep clean all tool vents and cooling systems
- Replace humidifier filters and water reservoirs
- Re-calibrate all power tools using the table saw tune-up checklist methodology
- Inspect and repair any insulation breaches in shop walls
Winter Workshop Tips Troubleshooting Guide
Even with perfect preparation, winter can throw curveballs. Here’s how to fix the most common cold-weather workshop problems:
Problem: Wood Cracking During Cutting
Why it happens: Wood becomes brittle below 35°F, especially hardwoods
Solution: Pre-warm wood for 24 hours in your shop before cutting. Increase blade tooth count (higher TPI) for cleaner cuts in cold material. Reduce feed rate by 25%.
Problem: Tools Binding or Sticking
Why it happens: Lubricants thicken in cold temperatures, metal parts contract at different rates
Solution: Switch to winter-weight lubricants. Run tools at idle speed for 3 minutes before use. Store critical tools in insulated containers with desiccant packs.
Problem: Static Electricity Shocks
Why it happens: Humidity below 30% creates perfect conditions for static buildup
Solution: Increase humidity to 35-40%. Use anti-static spray on clothing and tool handles. Ground yourself before touching tools by touching a grounded metal object first.
Problem: Measurements Changing Between Morning and Evening
Why it happens: Temperature swings cause wood and measuring tools to expand/contract
Solution: Create a dedicated measuring station away from heat sources and windows. Use the same measuring tools at the same time each day when temperatures stabilize.
Advanced Winter Workshop Tips for Serious Woodworkers
Once you’ve mastered the basics, these professional techniques will take your cold-weather woodworking to the next level:
Wood Stabilization Bath Technique
For critical projects requiring absolute stability, I use a wood stabilization process that prevents all seasonal movement:
- Vacuum-seal wood blanks in specialized resin
- Place in a pressure chamber for 24 hours
- Cure in a temperature-controlled oven at 180°F for 8 hours
- Allow to rest for 72 hours before use
This process completely fills the wood’s cellular structure, preventing any moisture exchange. A $45 investment in basic stabilization equipment has saved me thousands in ruined high-end projects.
Temperature-Mapped Workshop Layout
Create a detailed temperature map of your workshop to position tools and materials optimally:
- Use an infrared thermometer to measure surface temperatures at 20 different points
- Record temperatures at 8 AM, 12 PM, and 5 PM for one week
- Create a color-coded map showing temperature zones
- Position moisture-sensitive materials in stable zones (typically center of shop)
- Place heat-generating tools in cooler zones to balance overall temperature
This technique reduced my seasonal calibration time by 75% and virtually eliminated temperature-related project failures.
Winter Finish Application System
Applying finishes in cold weather requires special techniques:
The heated finishing booth:
- Construct a 4’x4’x6′ enclosure from PVC pipe and plastic sheeting
- Install a 60-watt incandescent bulb at the top for gentle heating
- Add a small fan for air circulation (not directed at workpiece)
- Use a hygrometer to maintain 70°F and 40% humidity during application
I finish all my holiday gifts in this booth during December. The controlled environment allows proper curing even when outdoor temperatures drop below freezing.

Frequently Asked Questions About Winter Workshop Preparation
Q: Do I really need to winterize my workshop if I only use it occasionally in winter?
A: Even occasional use requires basic preparation. The most common winter workshop failures happen during infrequent use when tools haven’t been properly maintained. At minimum, you need humidity control, tool warm-up procedures, and wood acclimation protocols. These basic winter workshop tips prevent 90% of seasonal problems.
Q: Can I use a space heater I already own, or do I need special workshop heating?
A: Standard household space heaters work fine for occasional use, but dedicated workshop heaters offer important safety features. Look for units with tip-over switches, overheat protection, and no exposed heating elements. Oil-filled radiators are safest for workshops but take longer to heat spaces. For frequent use, infrared heating panels mounted high on walls provide the most efficient, targeted warmth without fire hazards.
Q: How low can humidity go before wood damage becomes inevitable?
A: Sustained humidity below 25% will cause most domestic hardwoods to develop cracks and splits within 2-3 weeks. Exotic woods like rosewood and ebony can crack at humidity levels below 30%. The danger zone begins at 30% humidity—the point where you should activate your humidification system. With proper monitoring, you can maintain 35-40% humidity even in the driest winter months.
Q: Should I store my hand tools in my heated house during winter?
A: For premium hand tools (hand planes, chisels, measuring tools), yes—store them in your heated home when not in use. For power tools, leave them in the workshop but implement proper winterization protocols. The temperature fluctuation from moving tools between environments causes more problems than maintaining them in a stable cold environment. If you must move tools between spaces, place them in sealed plastic containers with desiccant to prevent condensation.
Q: What’s the minimum temperature to safely operate woodworking tools?
A: Most power tools can operate safely down to 40°F, but performance suffers significantly below 50°F. Lubricants thicken, motors strain, and accuracy decreases. For optimal performance, maintain your workshop at 60-65°F during operation. If you can’t heat the entire space, create a small heated enclosure around your primary work area using insulated curtains and targeted heating.
Q: How often should I re-calibrate my table saw during winter months?
A: Re-calibrate your table saw whenever temperatures change more than 15°F from your last calibration point. In most climates, this means weekly calibration during the transition months (November and March) and monthly calibration during stable winter periods (December-February). The 5-cut method takes just 12 minutes but prevents hours of frustrating project failures.
Q: Can I still use water-based finishes in winter?
A: Water-based finishes can be used in winter with proper environmental control. The application area must be maintained at 65-75°F with 35-45% humidity. Allow 24-48 hours between coats (double summer drying times). For best results, create a dedicated finishing booth with temperature and humidity control. Otherwise, switch to oil-based or wiping varnishes during cold months—they cure more reliably in variable conditions.
Now You’re Ready for the Complete System
You’ve learned the foundation. You understand the winter preparation methods. You know how to protect your tools from cold weather damage.
But here’s the truth: Most woodworkers stop here.
They master the basics… then hit a ceiling. They can prepare for winter, but they can’t control their precision in changing conditions. They have seasonal strategies, but they don’t have a SYSTEM.
That’s where The Table Saw Master’s Playbook comes in.
This isn’t just another PDF with plans. It’s the complete, step-by-step system I use to build furniture that actually fits together perfectly, every single time—regardless of season, humidity, or temperature.
You’ll learn: ✓ The 5-cut calibration method (chapter 2) – maintain dead-square cuts through seasonal changes
✓ How to build a professional crosscut sled (chapter 1) – make identical parts despite wood movement
✓ The miter sled that guarantees 45° angles (chapter 3) – perfect frames and boxes in any climate
✓ Master joinery techniques (chapter 4) – create joints that survive seasonal movement
✓ Your capstone project (chapter 5) – build a complete heirloom piece using all these techniques
Plus you get: Free tune-up checklist + Jig template pack + At-a-glance workshop checklist + Winter workshop supplement.
30-Day Money-Back Guarantee | Instant PDF Download | Lifetime Updates
This is the system that will take your workshop from “functional” to “professional”—no matter what the thermometer says.0
Let’s build something beautiful.